
Repair Checklist Templates in TimeFlow
Set up the pre-repair and post-repair checklists technicians use for quality control on every job task.
Updated · Workshop & technicians
Before you start
You need settings permission (admin access) to manage templates.
Finding this in the UI
- Header → profile menu (your avatar) → Settings, then the Repair Checklists tab (one of three Settings tabs, alongside Hardware and Notifications). This isn't in the left sidebar or footer — it's an admin setting reached through the header's profile menu.
Managing templates
The page has two sections: Pre-repair checklists and Post-repair checklists, each managing templates of that type, both with the same "New template" form and "Your templates" list below it.
Creating a template
- Enter a Name (e.g. "Phone Pre-Repair Inspection").
- Choose a Branch scope — "All branches" for a company-wide template, or a specific branch to limit where it's available.
- Add an optional Description — its placeholder says "Shown to admins in settings", so treat it as an internal note rather than something technicians see.
- Toggle Active on so it appears when technicians start a checklist ("You can deactivate later without deleting items.").
- Click Create template. A toast confirms "Template created" and it appears under "Your templates" with an item count and an Active badge. Only active templates are listed here — an inactive template is hidden from "Your templates" too, not just from technicians.
Adding items to a template
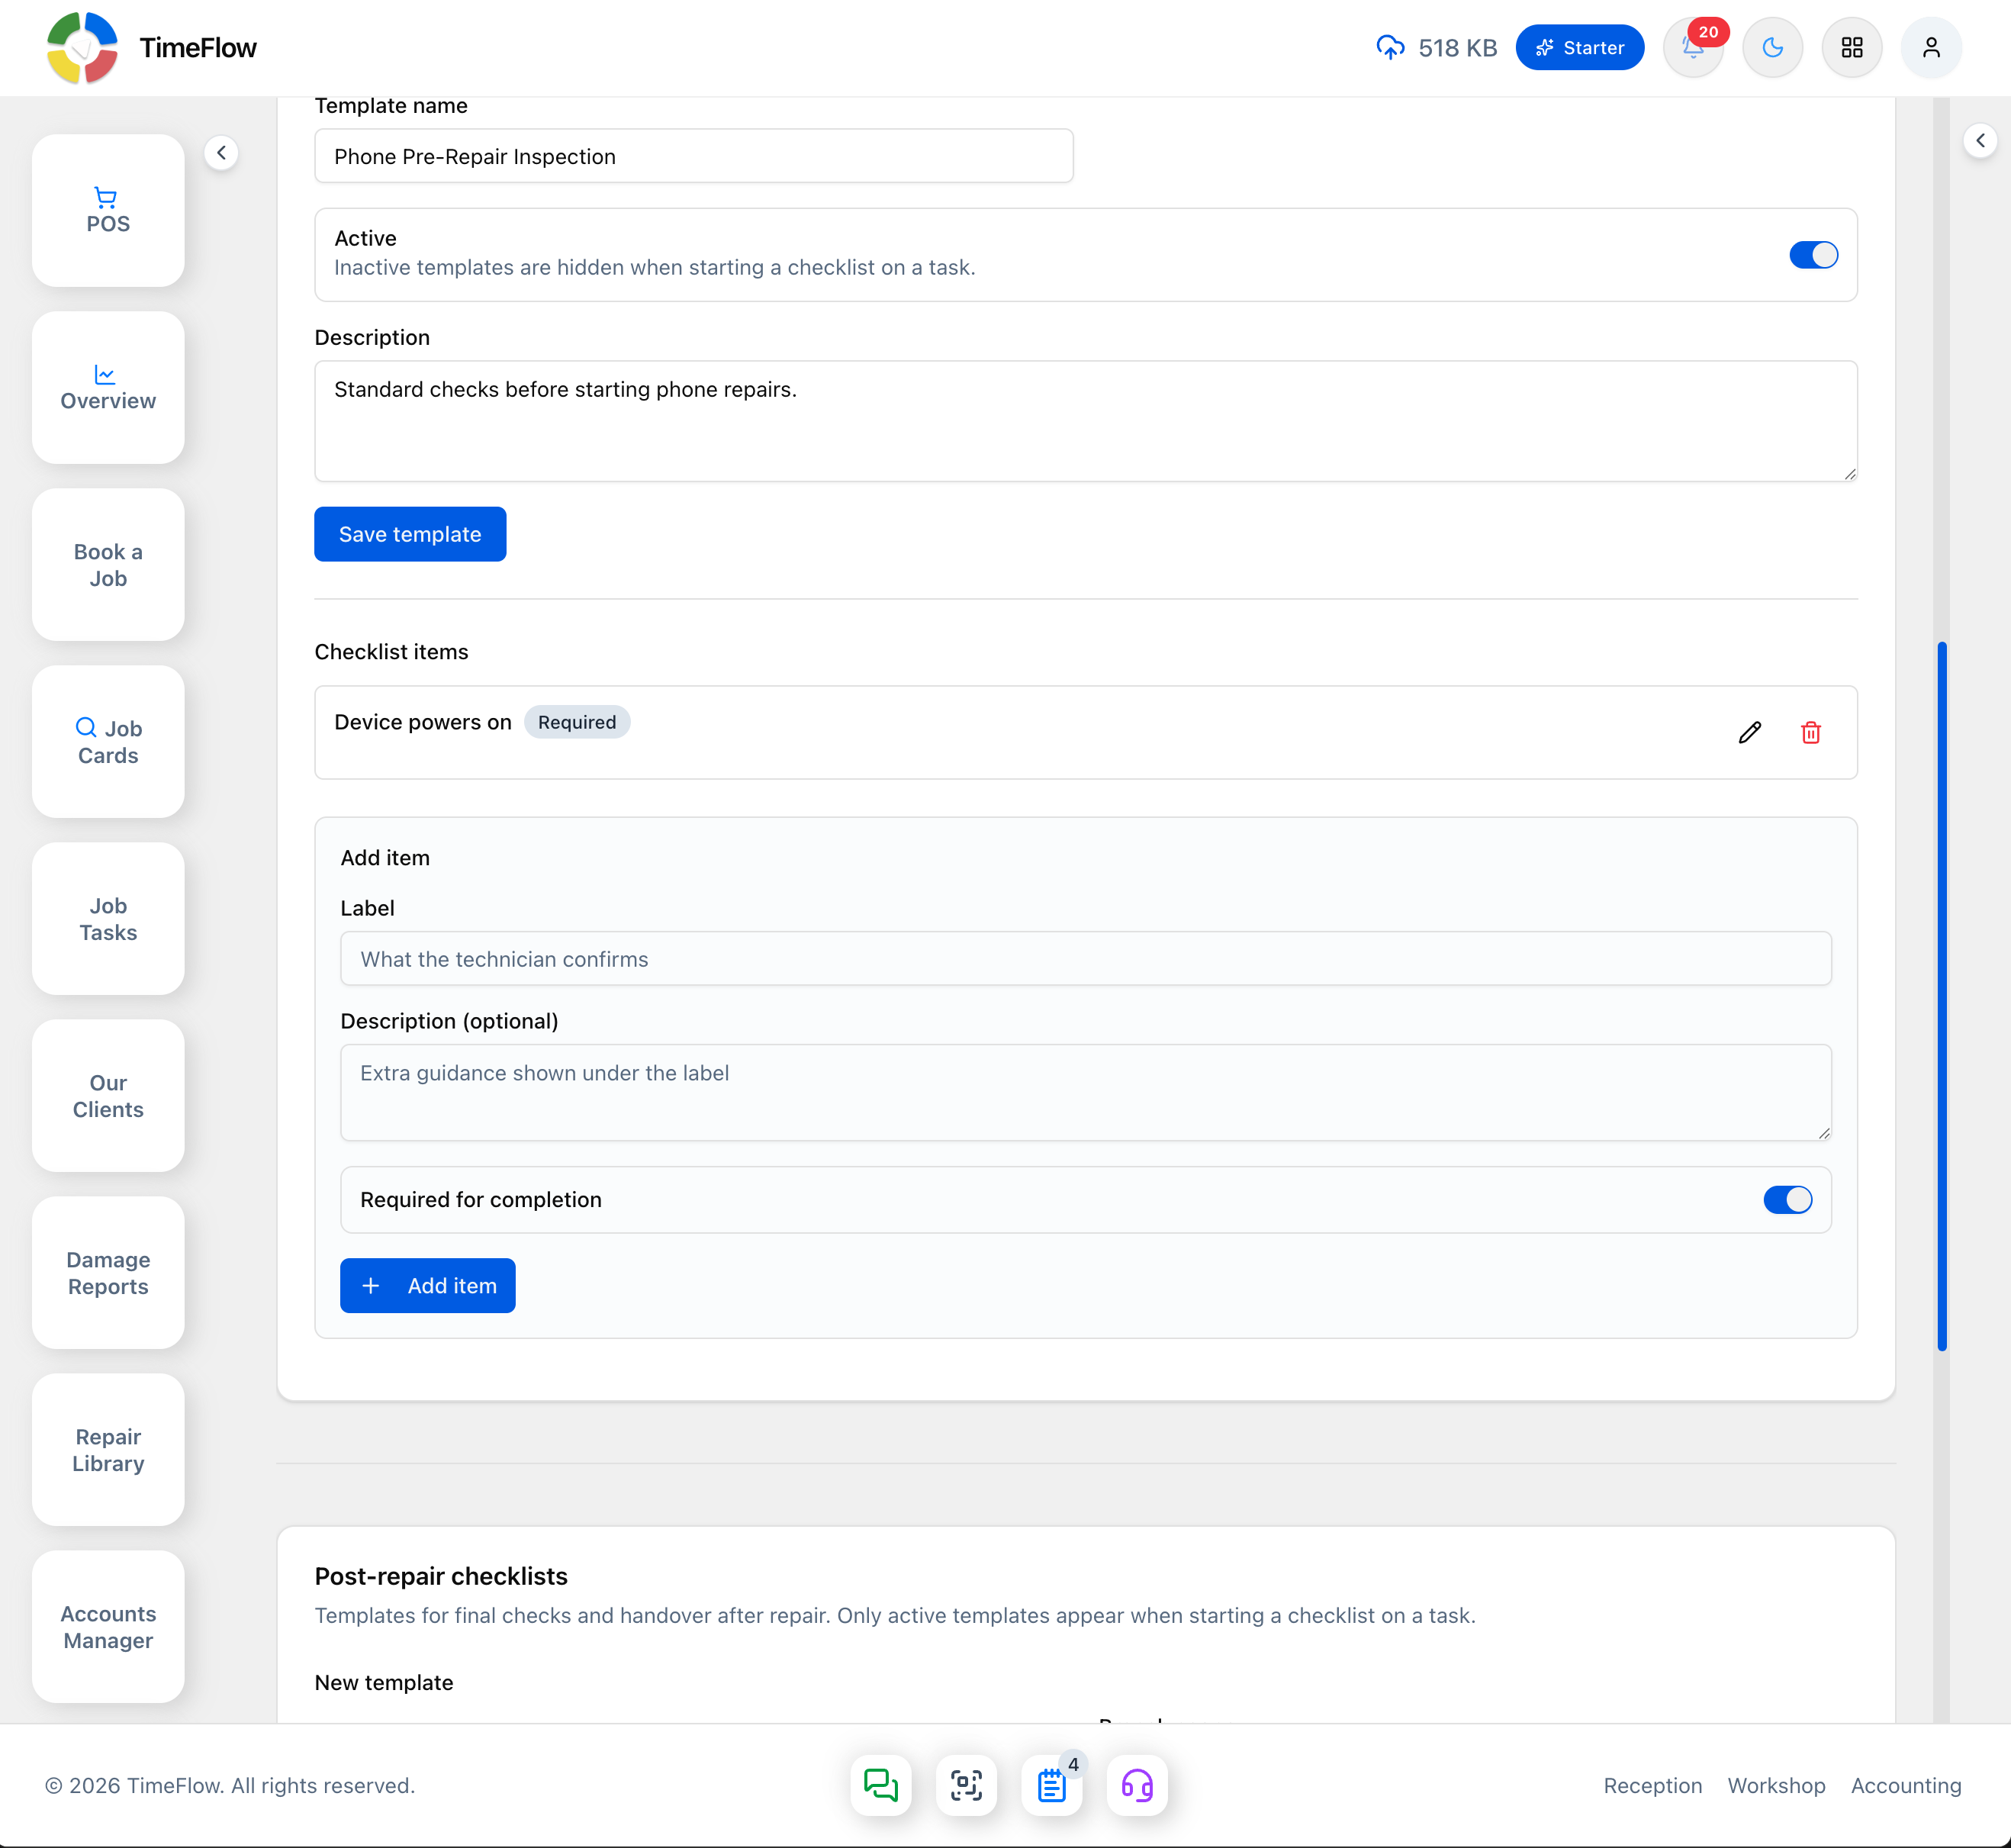
- Click the chevron next to a template in "Your templates" to expand it. The expanded view repeats Template name, Active (here captioned "Inactive templates are hidden when starting a checklist on a task."), and Description, with a Save template button for changes to those fields.
- Below that, Checklist items lists existing items (each showing its label and a "Required" badge when applicable, with edit-pencil and trash icons), then an Add item box:
- Label — what the technician confirms (e.g. "Device powers on").
- Description (optional) — extra guidance shown under the label.
- Required for completion toggle (on by default).
- Click Add item — a toast confirms "Item added" and it's added to the list above, in order.
Deleting a template
- Click the trash icon next to the template name and confirm. This permanently removes the template and all its items — but checklists already created from it on tasks are unaffected.
Tips
- Deactivating a template (rather than deleting it) is reversible and doesn't affect checklists already in progress — but note it also drops out of "Your templates" until you reactivate it, so you can't casually browse inactive templates from this list.
- Branch-specific templates are useful when different locations have different intake or handover processes.
- This is where the templates come from that technicians pick in the Repair Checklist section of a job task — see the Job Tasks guide.
Frequently asked questions
How do technicians use repair checklists?
On a job task, technicians click Start Checklist under Pre-repair or Post-repair, choose an active template, and tick off each item with optional notes.
Related guides
- Job tasksAssign job cards to technicians with priority and due dates, move repairs through statuses like Awaiting Parts, log parts used, comments, and technical reports.
- Account settingsFind TimeFlow's Settings page and its three tabs — repair checklist templates, receipt and label printer hardware, and notification preferences.