
Job Tasks in TimeFlow
Job tasks are how work gets assigned to technicians and tracked through to completion — checklists, parts used, warranty, and comments all live on the task.
Updated · Workshop & technicians
On this page
Before you start
You need technician or reception permission to view tasks; booking permission is also accepted on the task detail page.
Finding this in the UI
- Left sidebar → Job Tasks opens the full task list (
/dashboard/workshop/job-tasks). - The Jobs panel docked to the right edge of the dashboard (see the Navigating the TimeFlow Interface guide) has a Job Tasks tab for quickly searching tasks and a Job Cards tab for finding a job card to turn into a task.
- From the Workshop hub (
Dashboard → Workshop, via the sidebar's Dashboard item for technicians, or the footer's Workshop link), Quick Actions has View Tasks (full list) and Search (filtered search — see the Searching Job Cards & Job Tasks guide).
Creating a task (assigning a job card)
There's no separate "new task" form — a task is created by assigning a job card:
- Open the Jobs panel on the right edge of the dashboard.
- Switch to the Job Cards tab and search by job card number, client, or serial number.
- Click Assign on the job card.
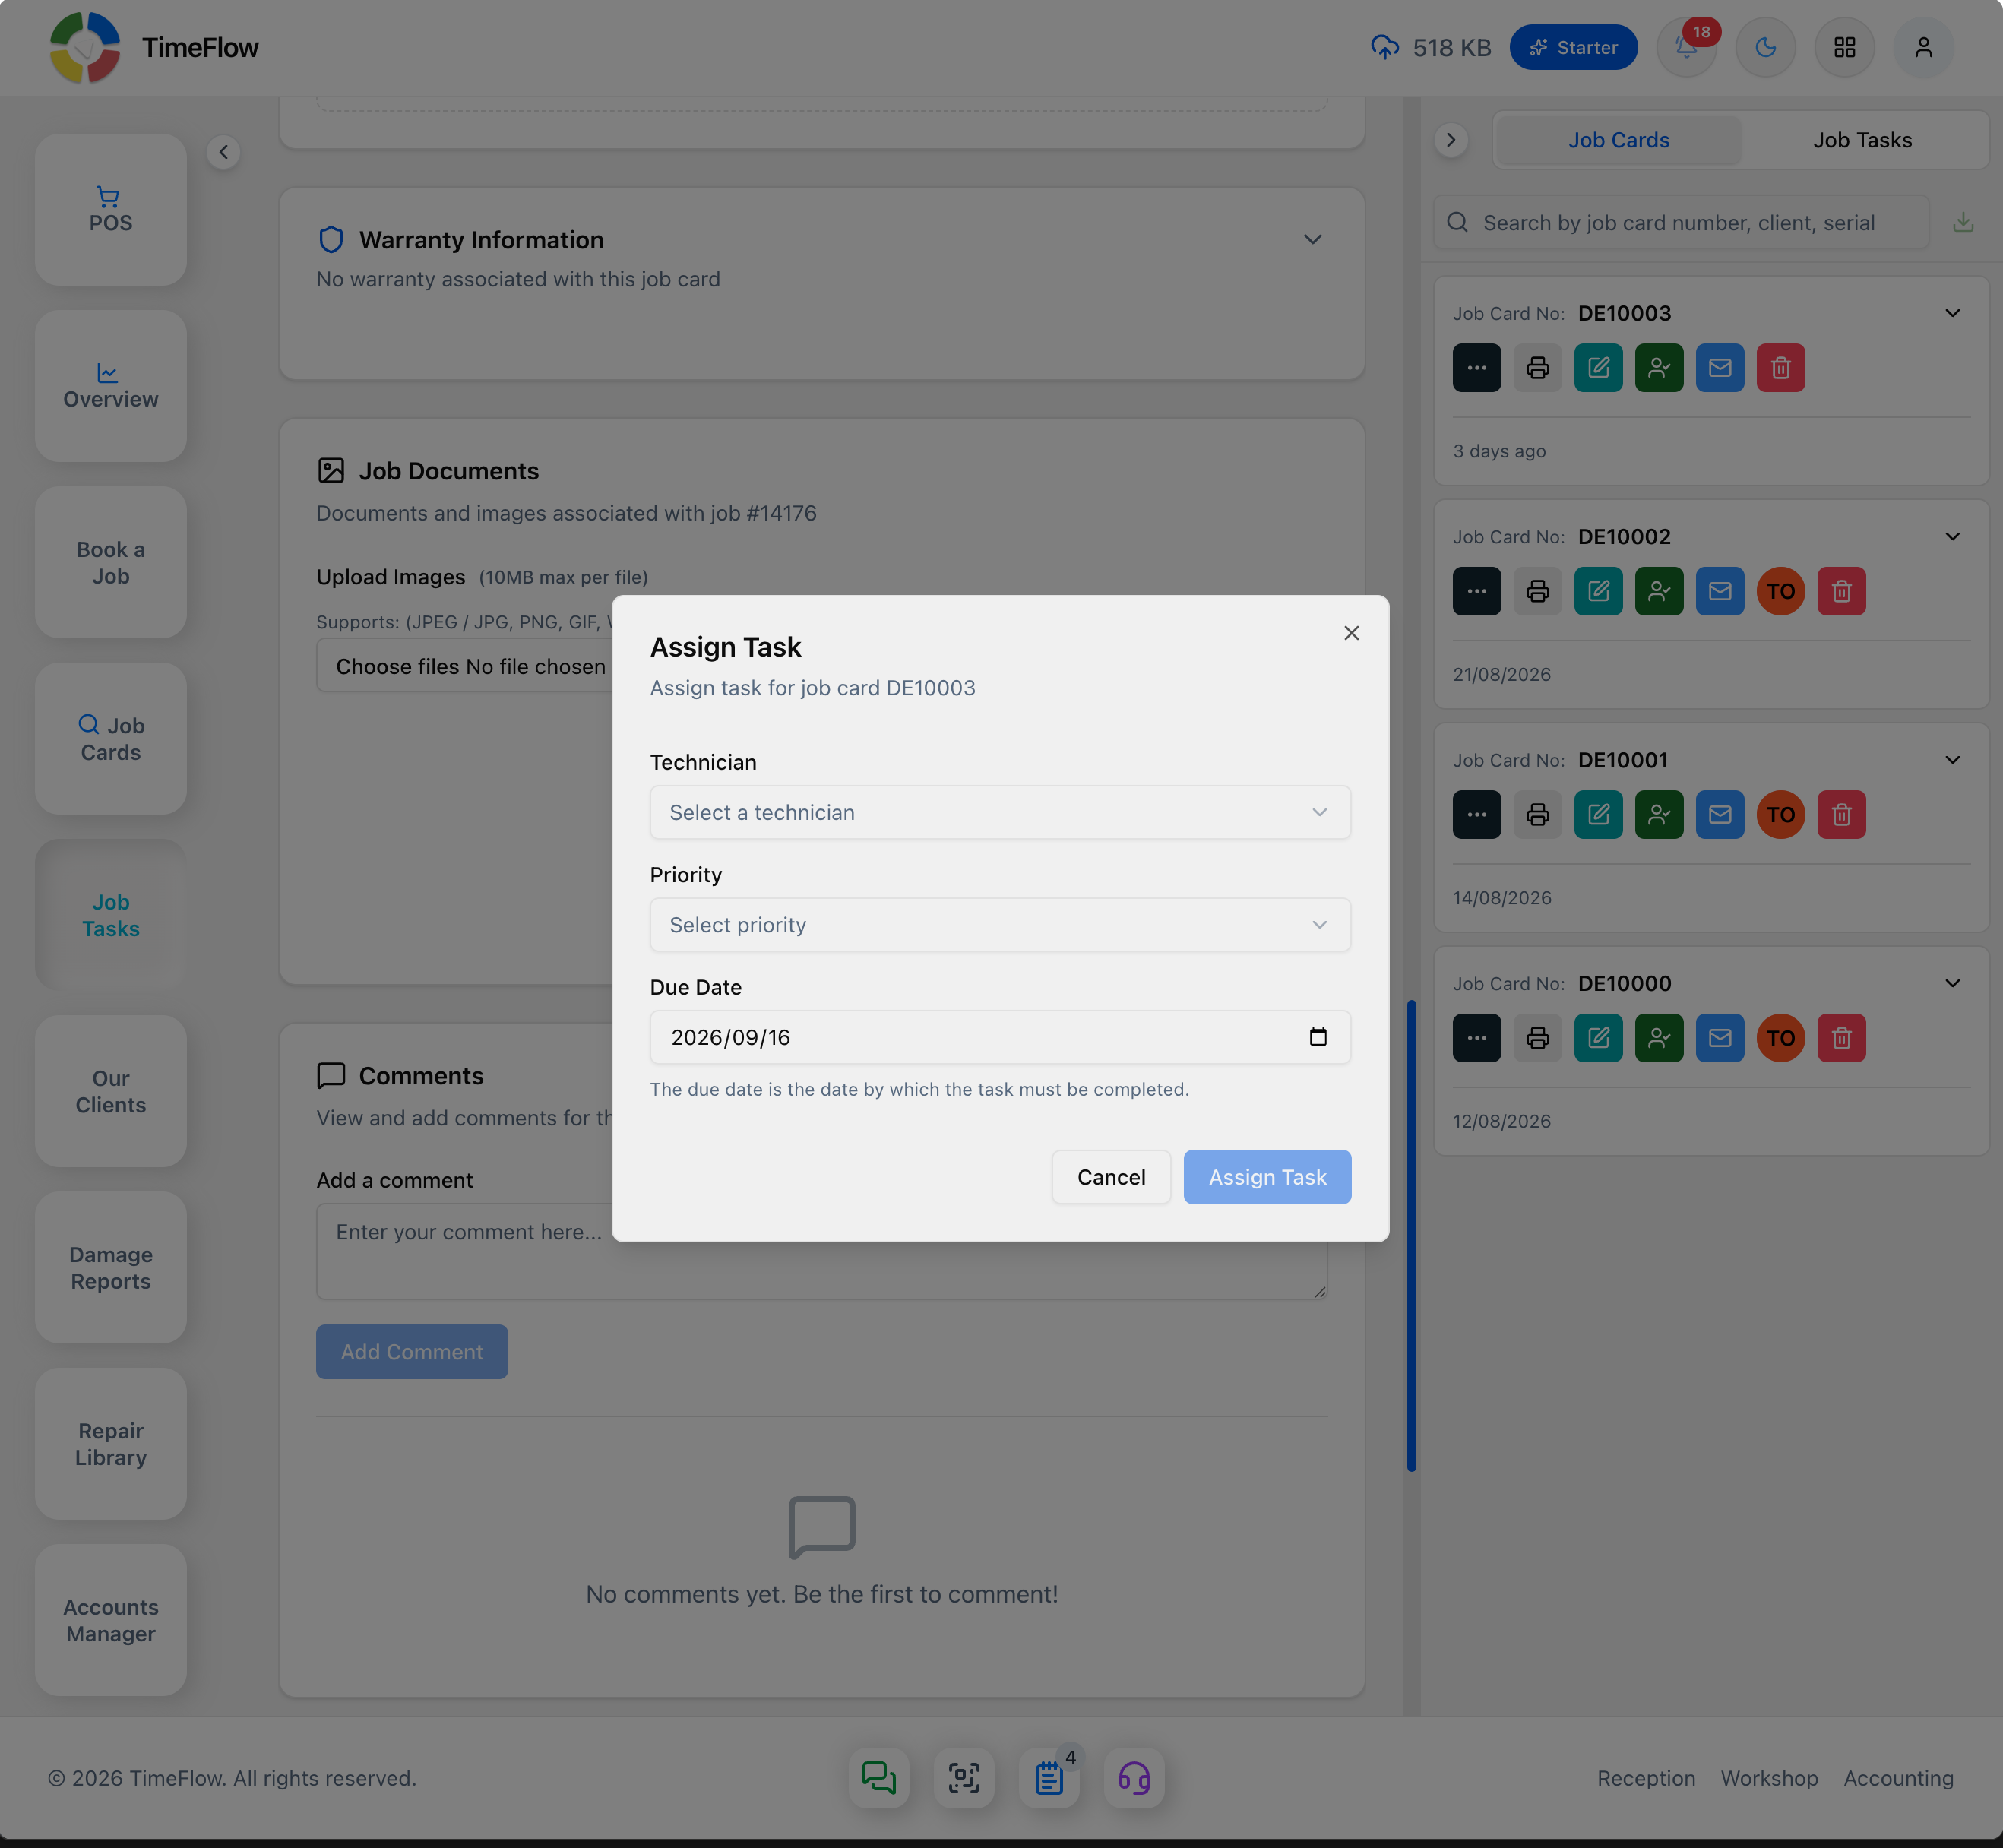
- In the Assign Task dialog, choose:
- Technician (required)
- Priority — Low, Medium, High, or Urgent (required)
- Due Date — pre-filled to the next day, editable.
- Click Assign Task. This creates the job task and links it to the job card.
If no technicians appear in the list, add a team member with the Technician role first (see the Company Account guide).
Reassigning or updating priority/due date
Use the same Jobs panel, but switch to the Job Tasks tab, search for the task, and click Assign again to change technician, priority, or due date.
The task detail page
Click any task (from the list, search results, or a notification) to open Job Task: <task number> (/dashboard/workshop/job-tasks/[number]). This page brings everything about the task together:
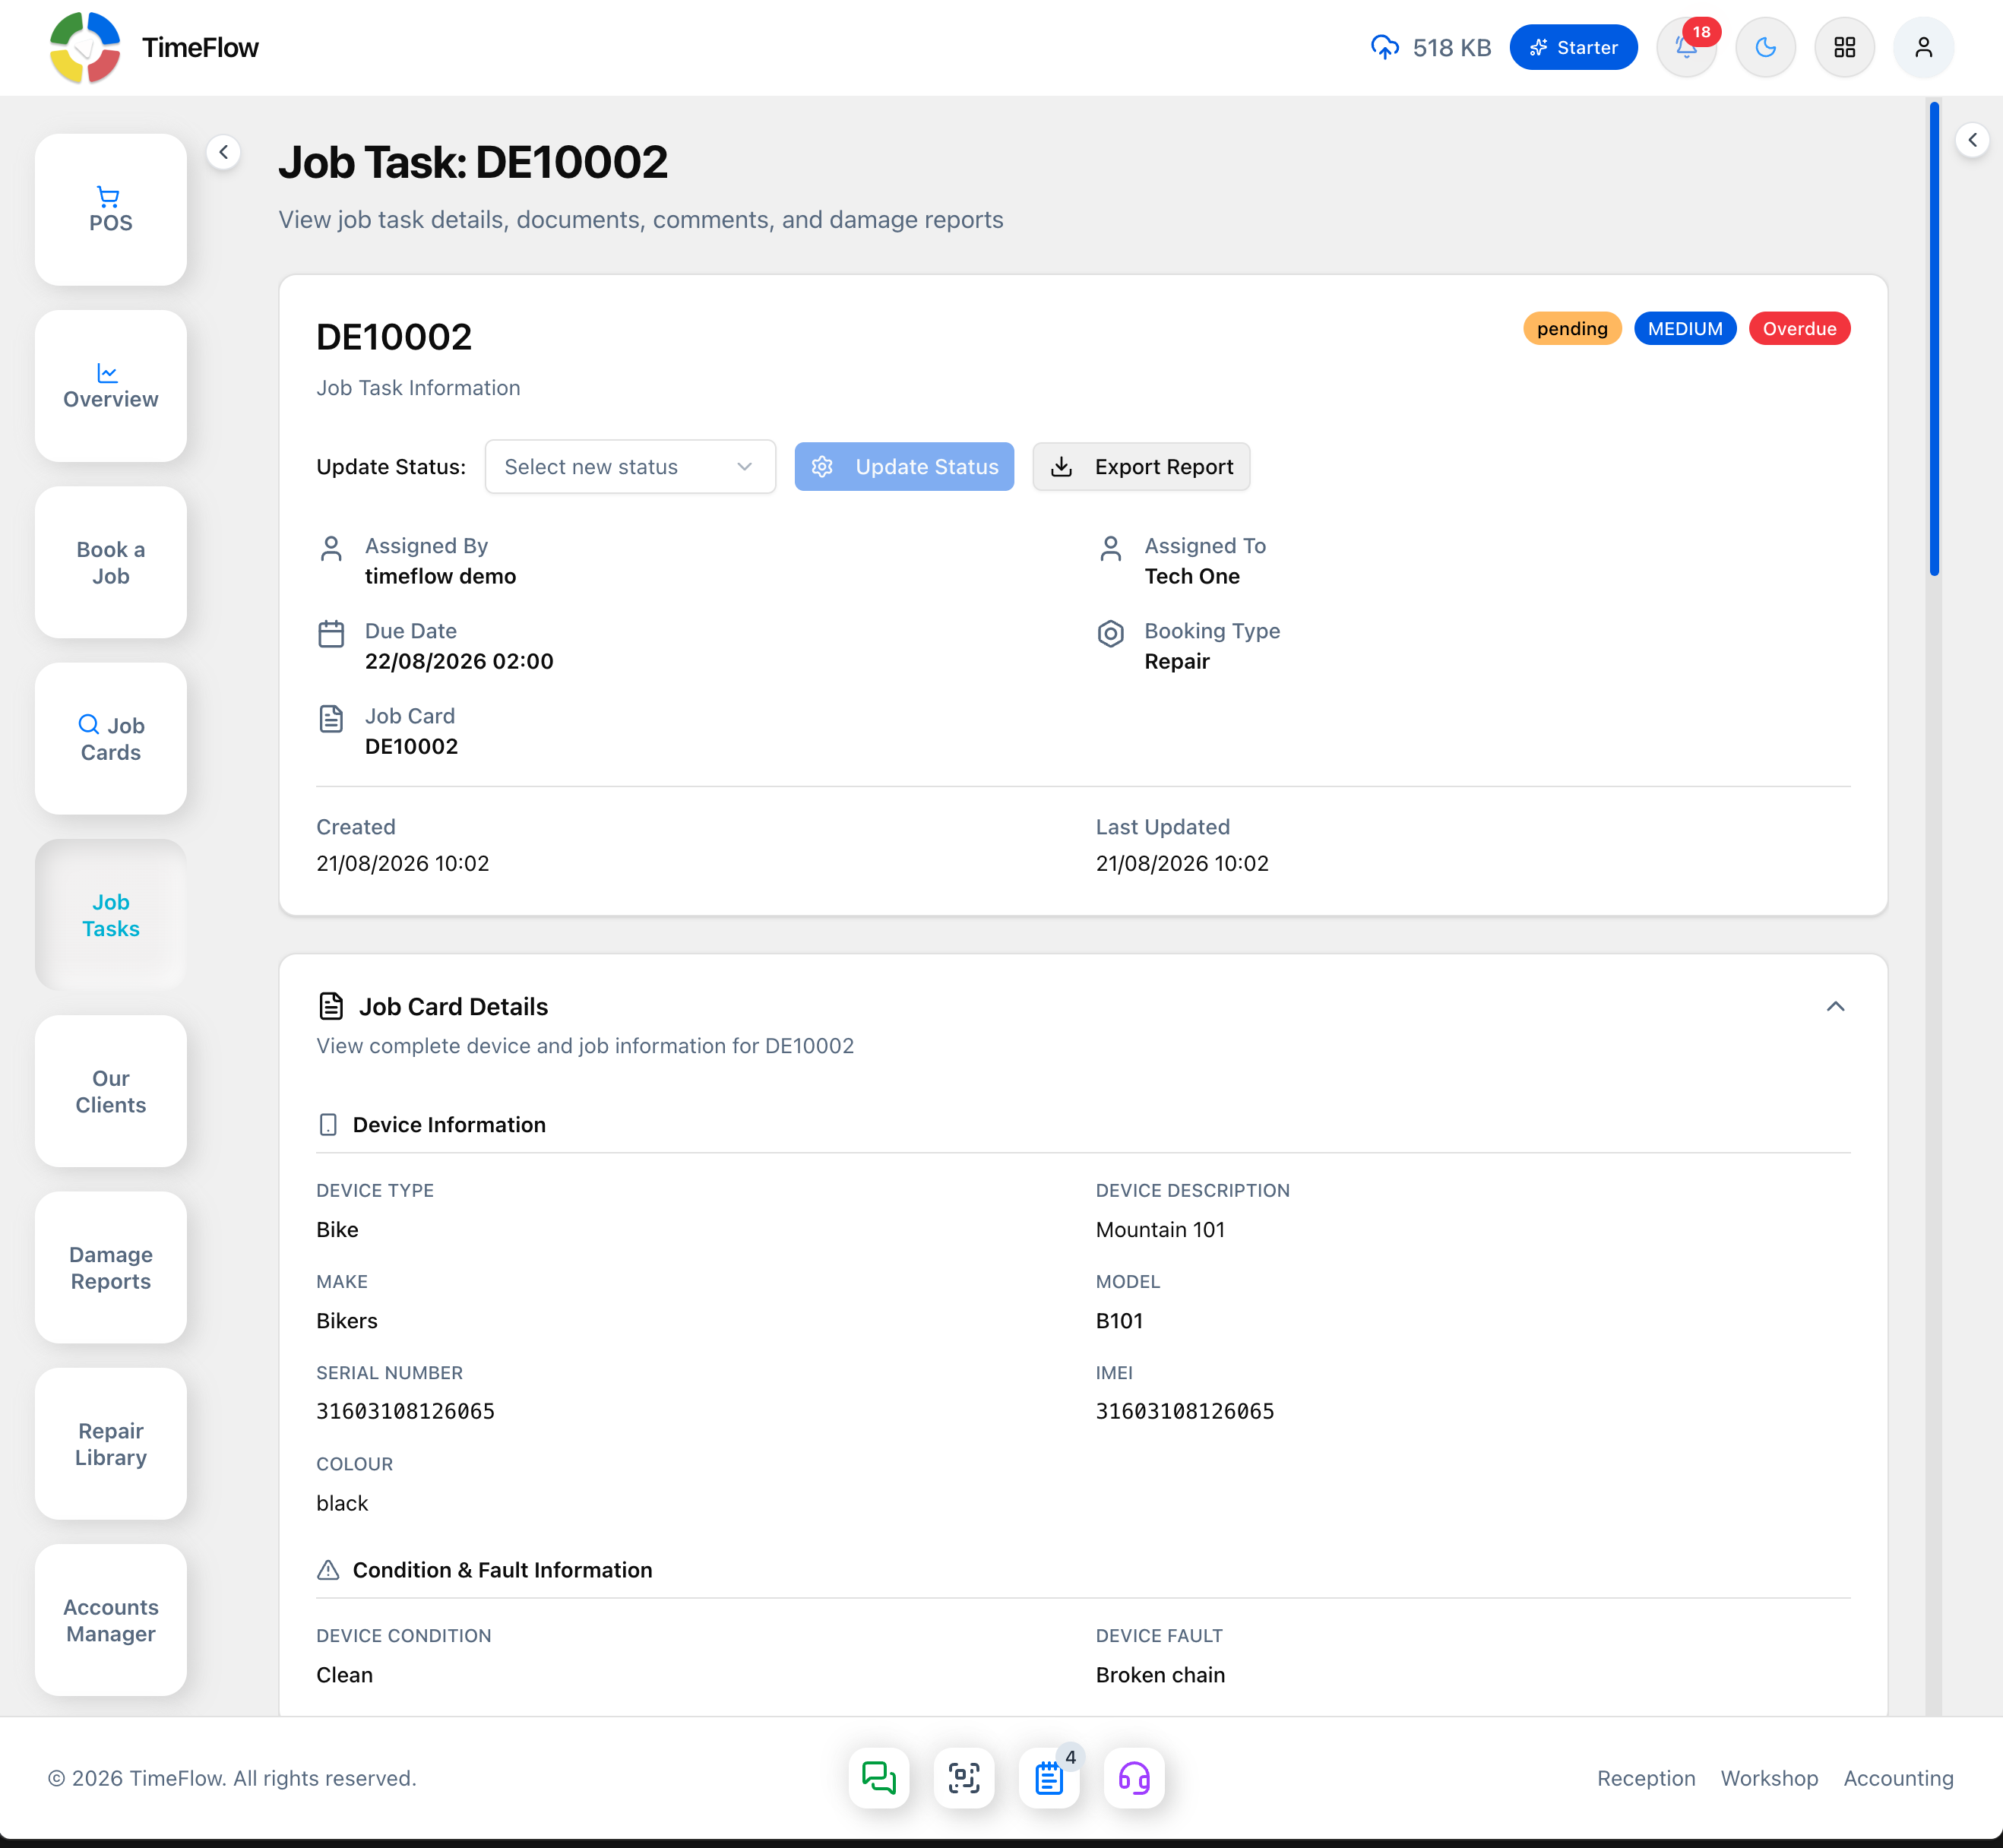
- Header — task number, status badge, priority badge, an "Overdue" badge if past due, an Export Report button, assigned by/to, due date, booking type, job card number, and created/last-updated timestamps.
- Update Status — a dropdown to move the task through: Pending, In Progress, Awaiting Feedback, Awaiting Parts, Awaiting Approval, On Hold, Reopened, Under Review, Complete, Collected, Closed. Pick a new status and click Update Status.
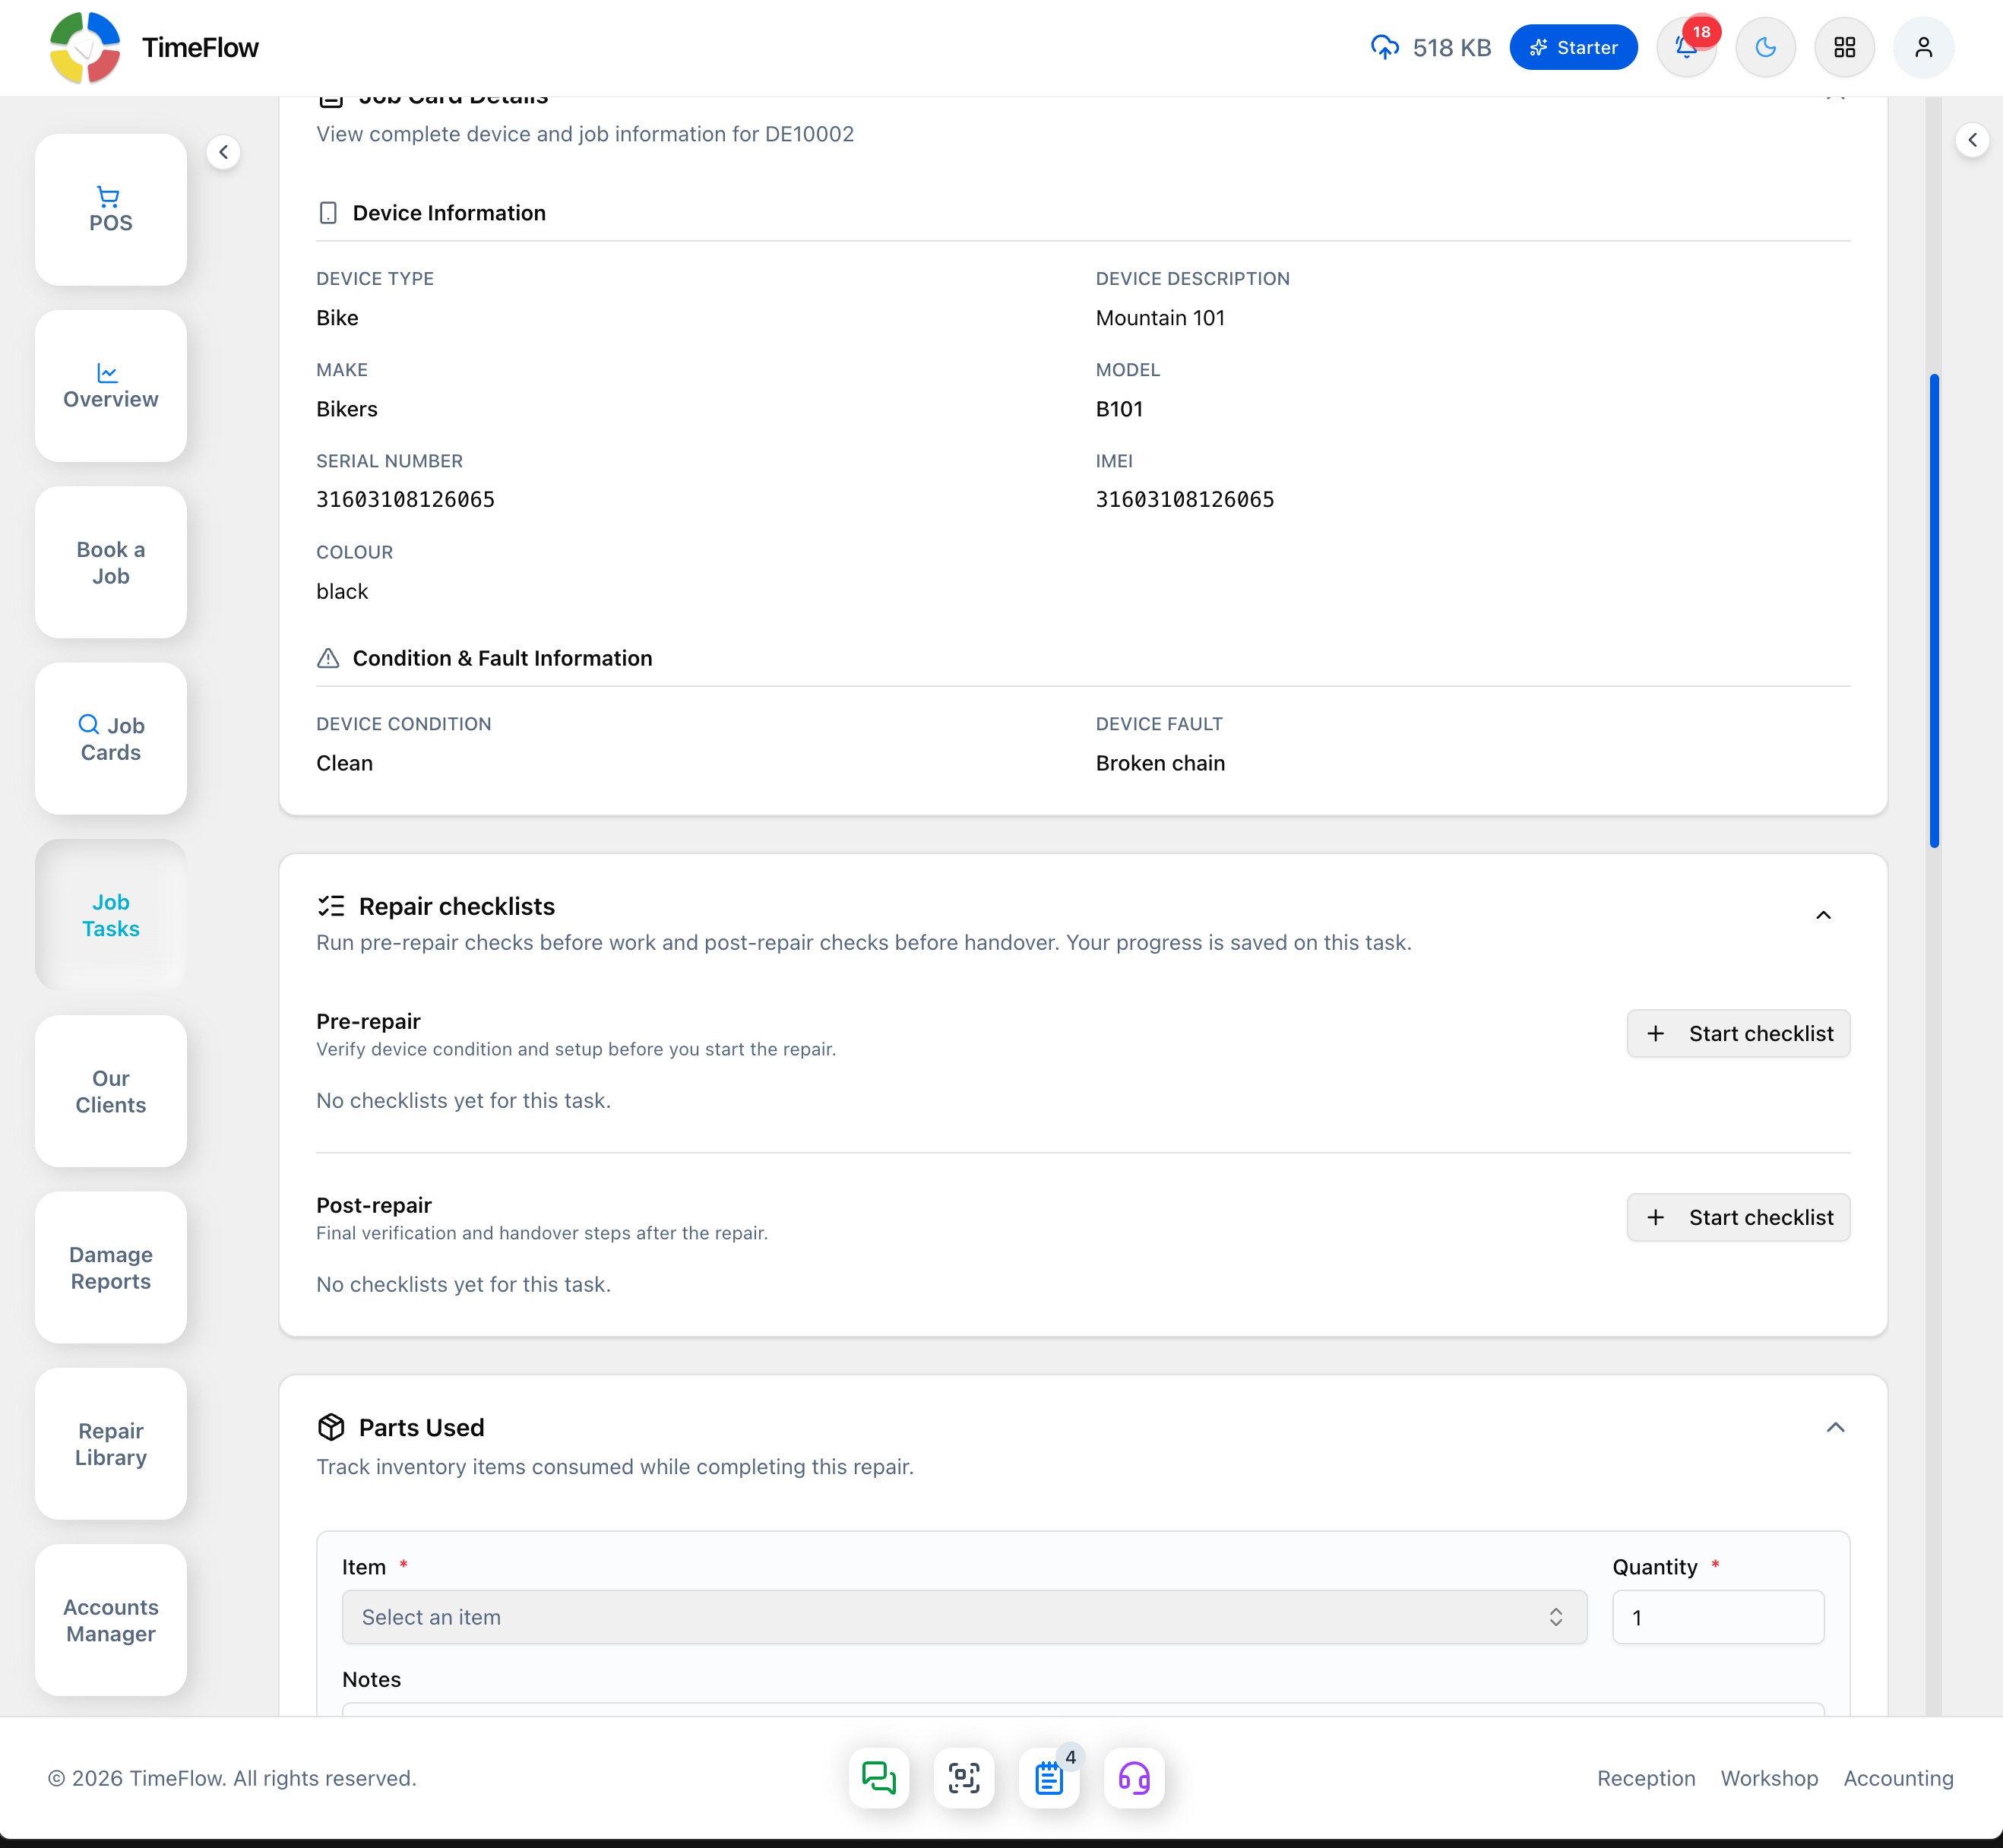
- Job Card Details (collapsible) — the linked job card's Device Information (type, description, make, model, serial number, IMEI, colour) and Condition & Fault Information, read-only here (edit them from the job card itself).
- Repair Checklists (collapsible) — split into Pre-repair ("Verify device condition and setup before you start the repair") and Post-repair ("Final verification and handover steps after the repair"), each with its own Start Checklist button. Starting one lets you pick a checklist template, tick off items as they're completed, add optional notes per item and overall checklist notes, then save/complete it. See also the Repair Checklist Templates guide for setting these up.
- Parts Used (collapsible) — record inventory items consumed on this task: Item (select), Quantity, and optional Notes (e.g. lot number or where it was used), then click Add Part. Recorded parts appear in a "Parts on this task" list below.
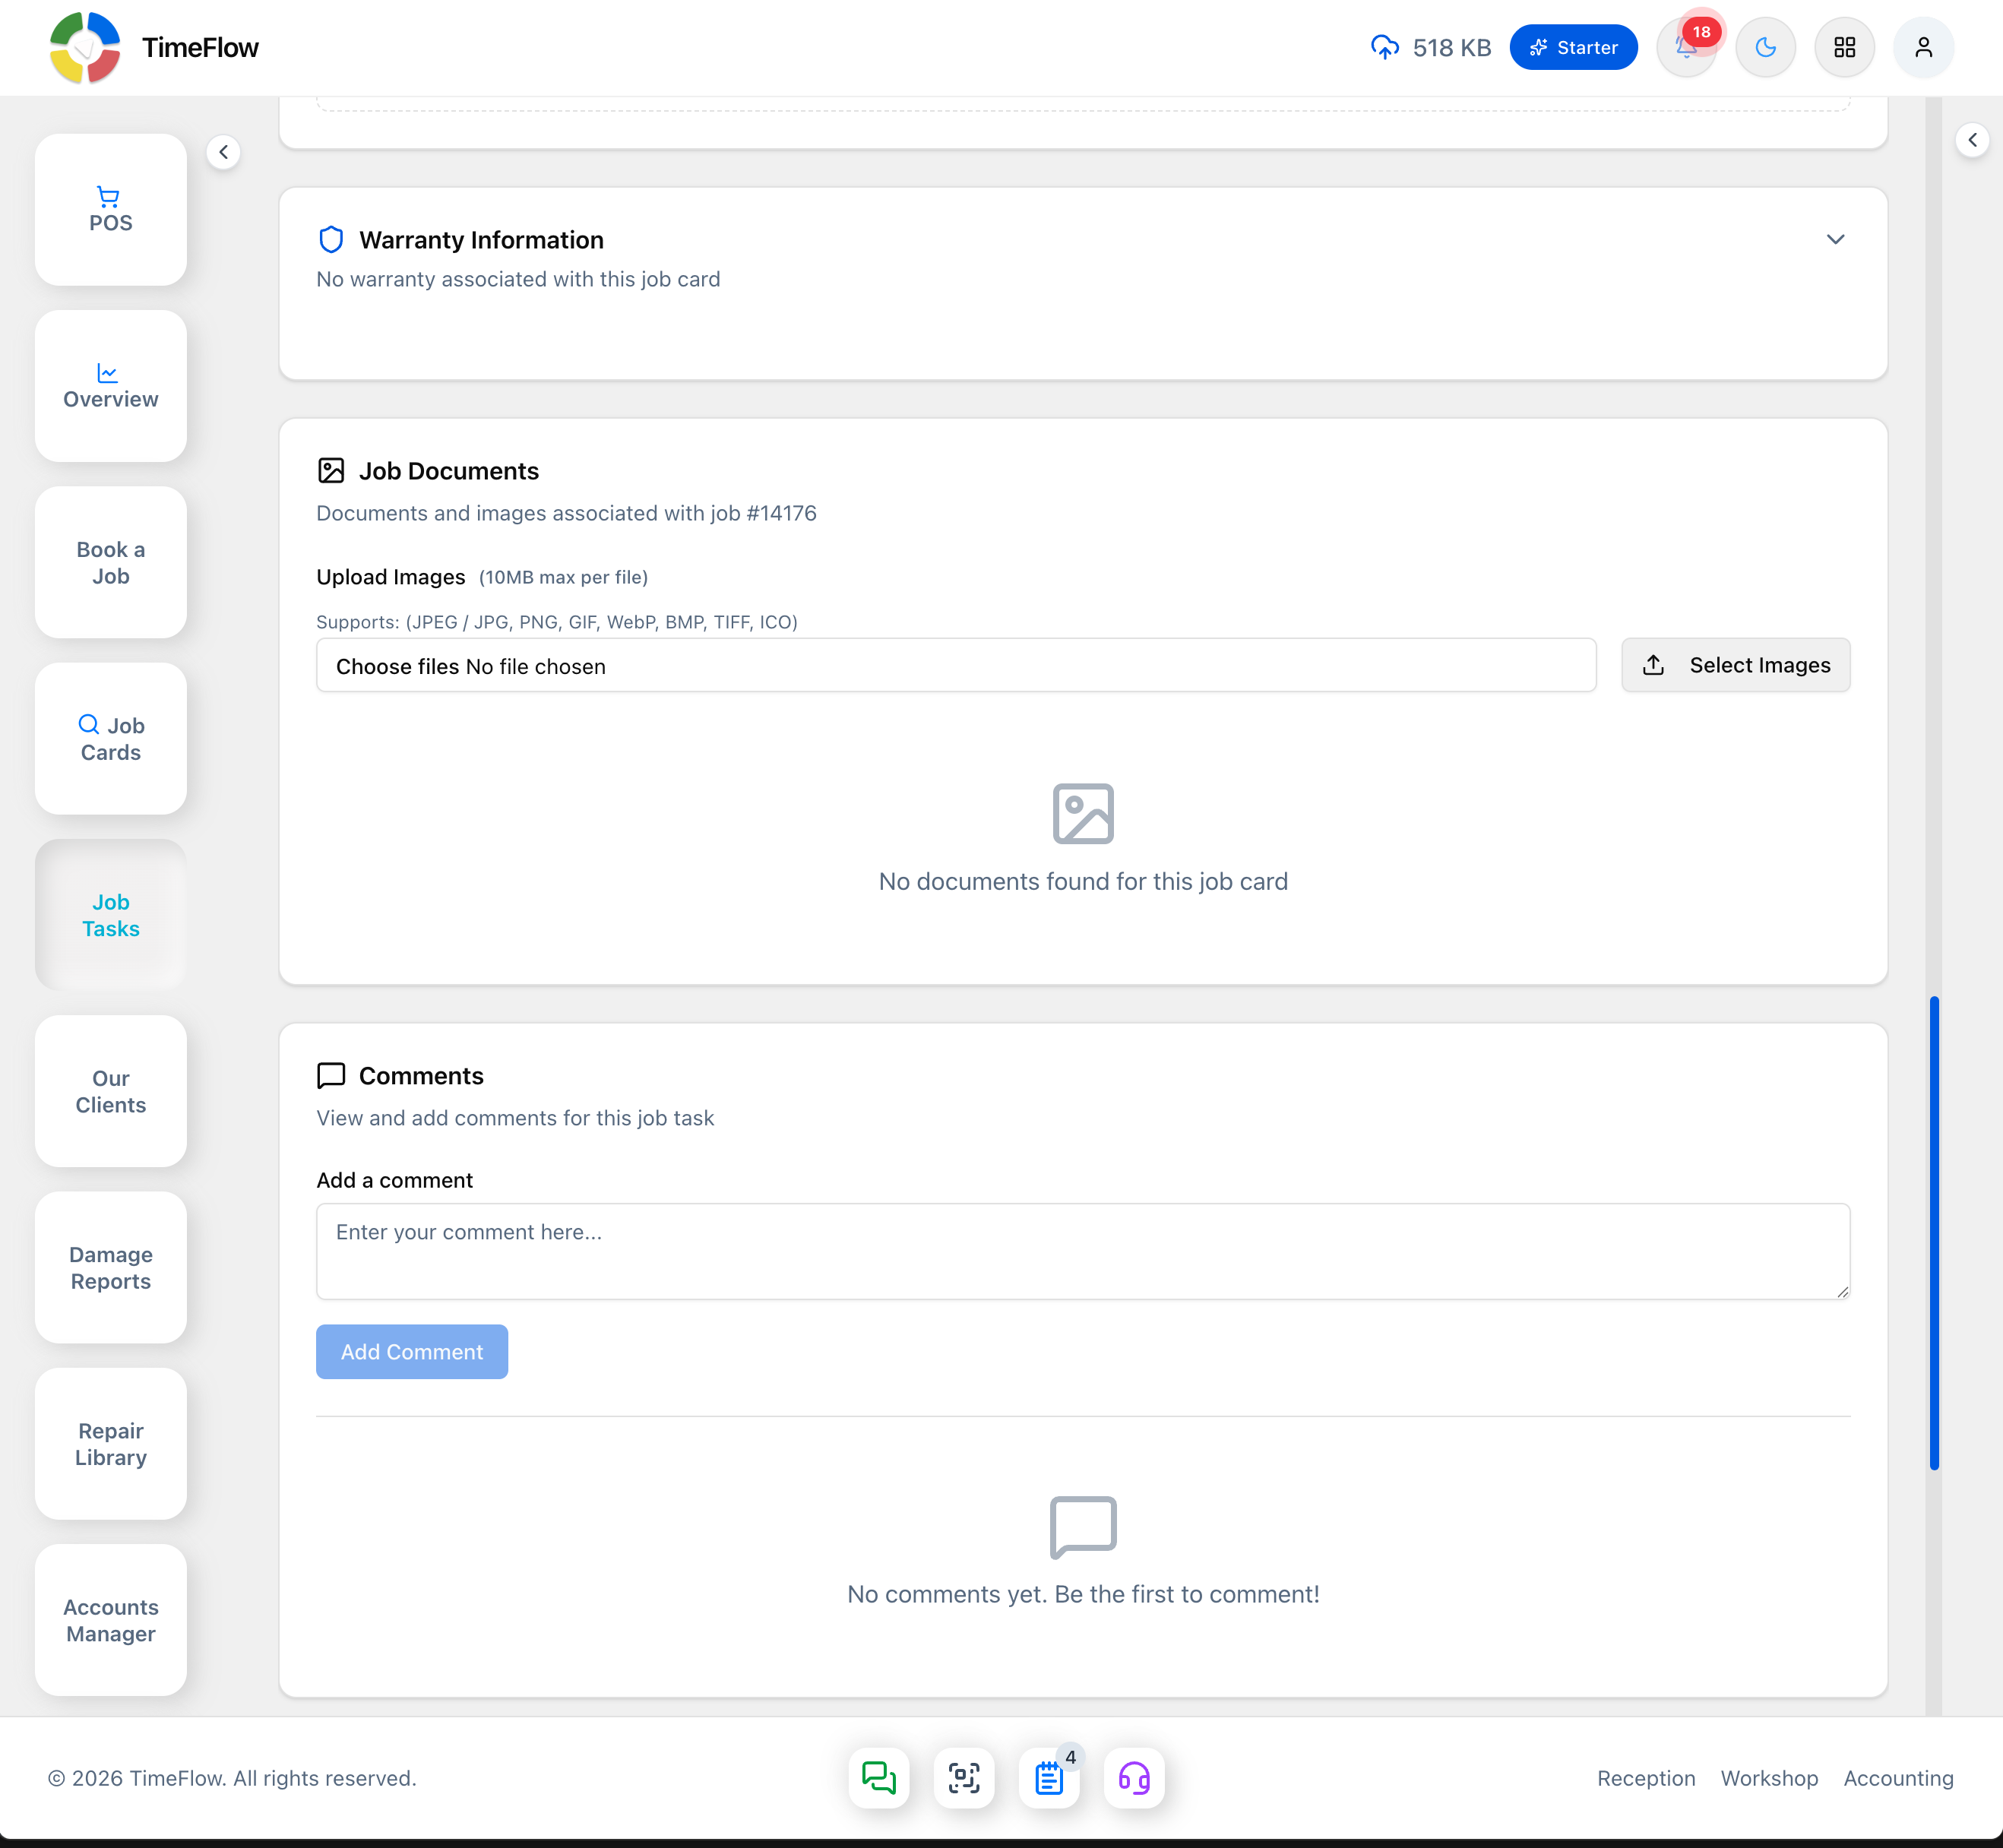
- Warranty Information (collapsible) — set up or view the warranty tied to this job card. See the Job Card & Job Task Warranty guide for the full field list.
- Job Documents — upload images related to the job card (JPEG/JPG, PNG, GIF, WebP, BMP, TIFF, ICO; 10MB max per file) via Select Images; uploaded documents are listed below.
- Comments — a running discussion thread on the task: type a comment and click Add Comment to post it; existing comments can be edited or deleted by their author.
- Technical Reports — a separate free-text log from Comments, for formal technical write-ups (up to 1000 characters): type a report and click Add Technical Report.
Tips
- Status changes, checklist completion, and comments all build a history on the task — useful for handovers between technicians or shifts.
- If a task looks stuck, check "Awaiting Parts" or "Awaiting Approval" as the status before assuming nothing is happening.
Frequently asked questions
How do I assign a repair to a technician in TimeFlow?
Open the Jobs panel on the right edge of the dashboard, search the job card on the Job Cards tab, click Assign, and choose the technician, priority, and due date.
What repair statuses does TimeFlow use?
Pending, In Progress, Awaiting Feedback, Awaiting Parts, Awaiting Approval, On Hold, Reopened, Under Review, Complete, Collected, and Closed.
Related guides
- Booking a job cardBook a device or vehicle in for repair: create a digital job card with client details, IMEI/serial, condition, fault, insurance claim, and intake photos.
- Repair checklist templatesBuild pre-repair and post-repair quality-control checklists for technicians, with required items, branch-specific templates, and per-item notes.
- Searching job cards & tasksSearch job cards by date, job number, serial/IMEI, client name, or phone, and search job tasks by technician, assigner, or overdue status.