
Company Account in TimeFlow
The company-wide account page: your business details, banking, branches, currency, tax configuration, team members, timezone, and (for owners) business account deletion.
Updated · Getting started & account
On this page
Before you start
You need company account permission for most tabs. Currency and Tax Configs have their own dedicated guides (Multi-Currency, Tax Reports & VAT Settings). The Business Account tab is owner-only.
Finding this in the UI
- Header → profile menu → Company Account, or go directly to
/dashboard/accounts/account. - The left sidebar and footer do not have direct links here.
Company tab
Starts with a Company Logo uploader (Change Logo / Remove, recommended 200×200px, max 5MB), then Basic Information: Company Name, Company Size, Registration Number, VAT Registration Number. Under Contact Information: Email and Telephone Number (each shows an Unverified badge and a Verify button until confirmed), Fax Number, Website. Under Location Information: Country, Address (max two lines). Finally, three long-form Terms and Conditions fields that print on your documents — General Terms and Conditions, Invoice Terms and Conditions, and Quotation Terms and Conditions — each capped at 2000 characters with a live character count. Click Save Company Details to save.
Banking tab
Your company's bank account details, shown on invoices and quotations: Bank, Account Name, Account Number, Branch Code, IBAN, and SWIFT/BIC.
Branchs tab
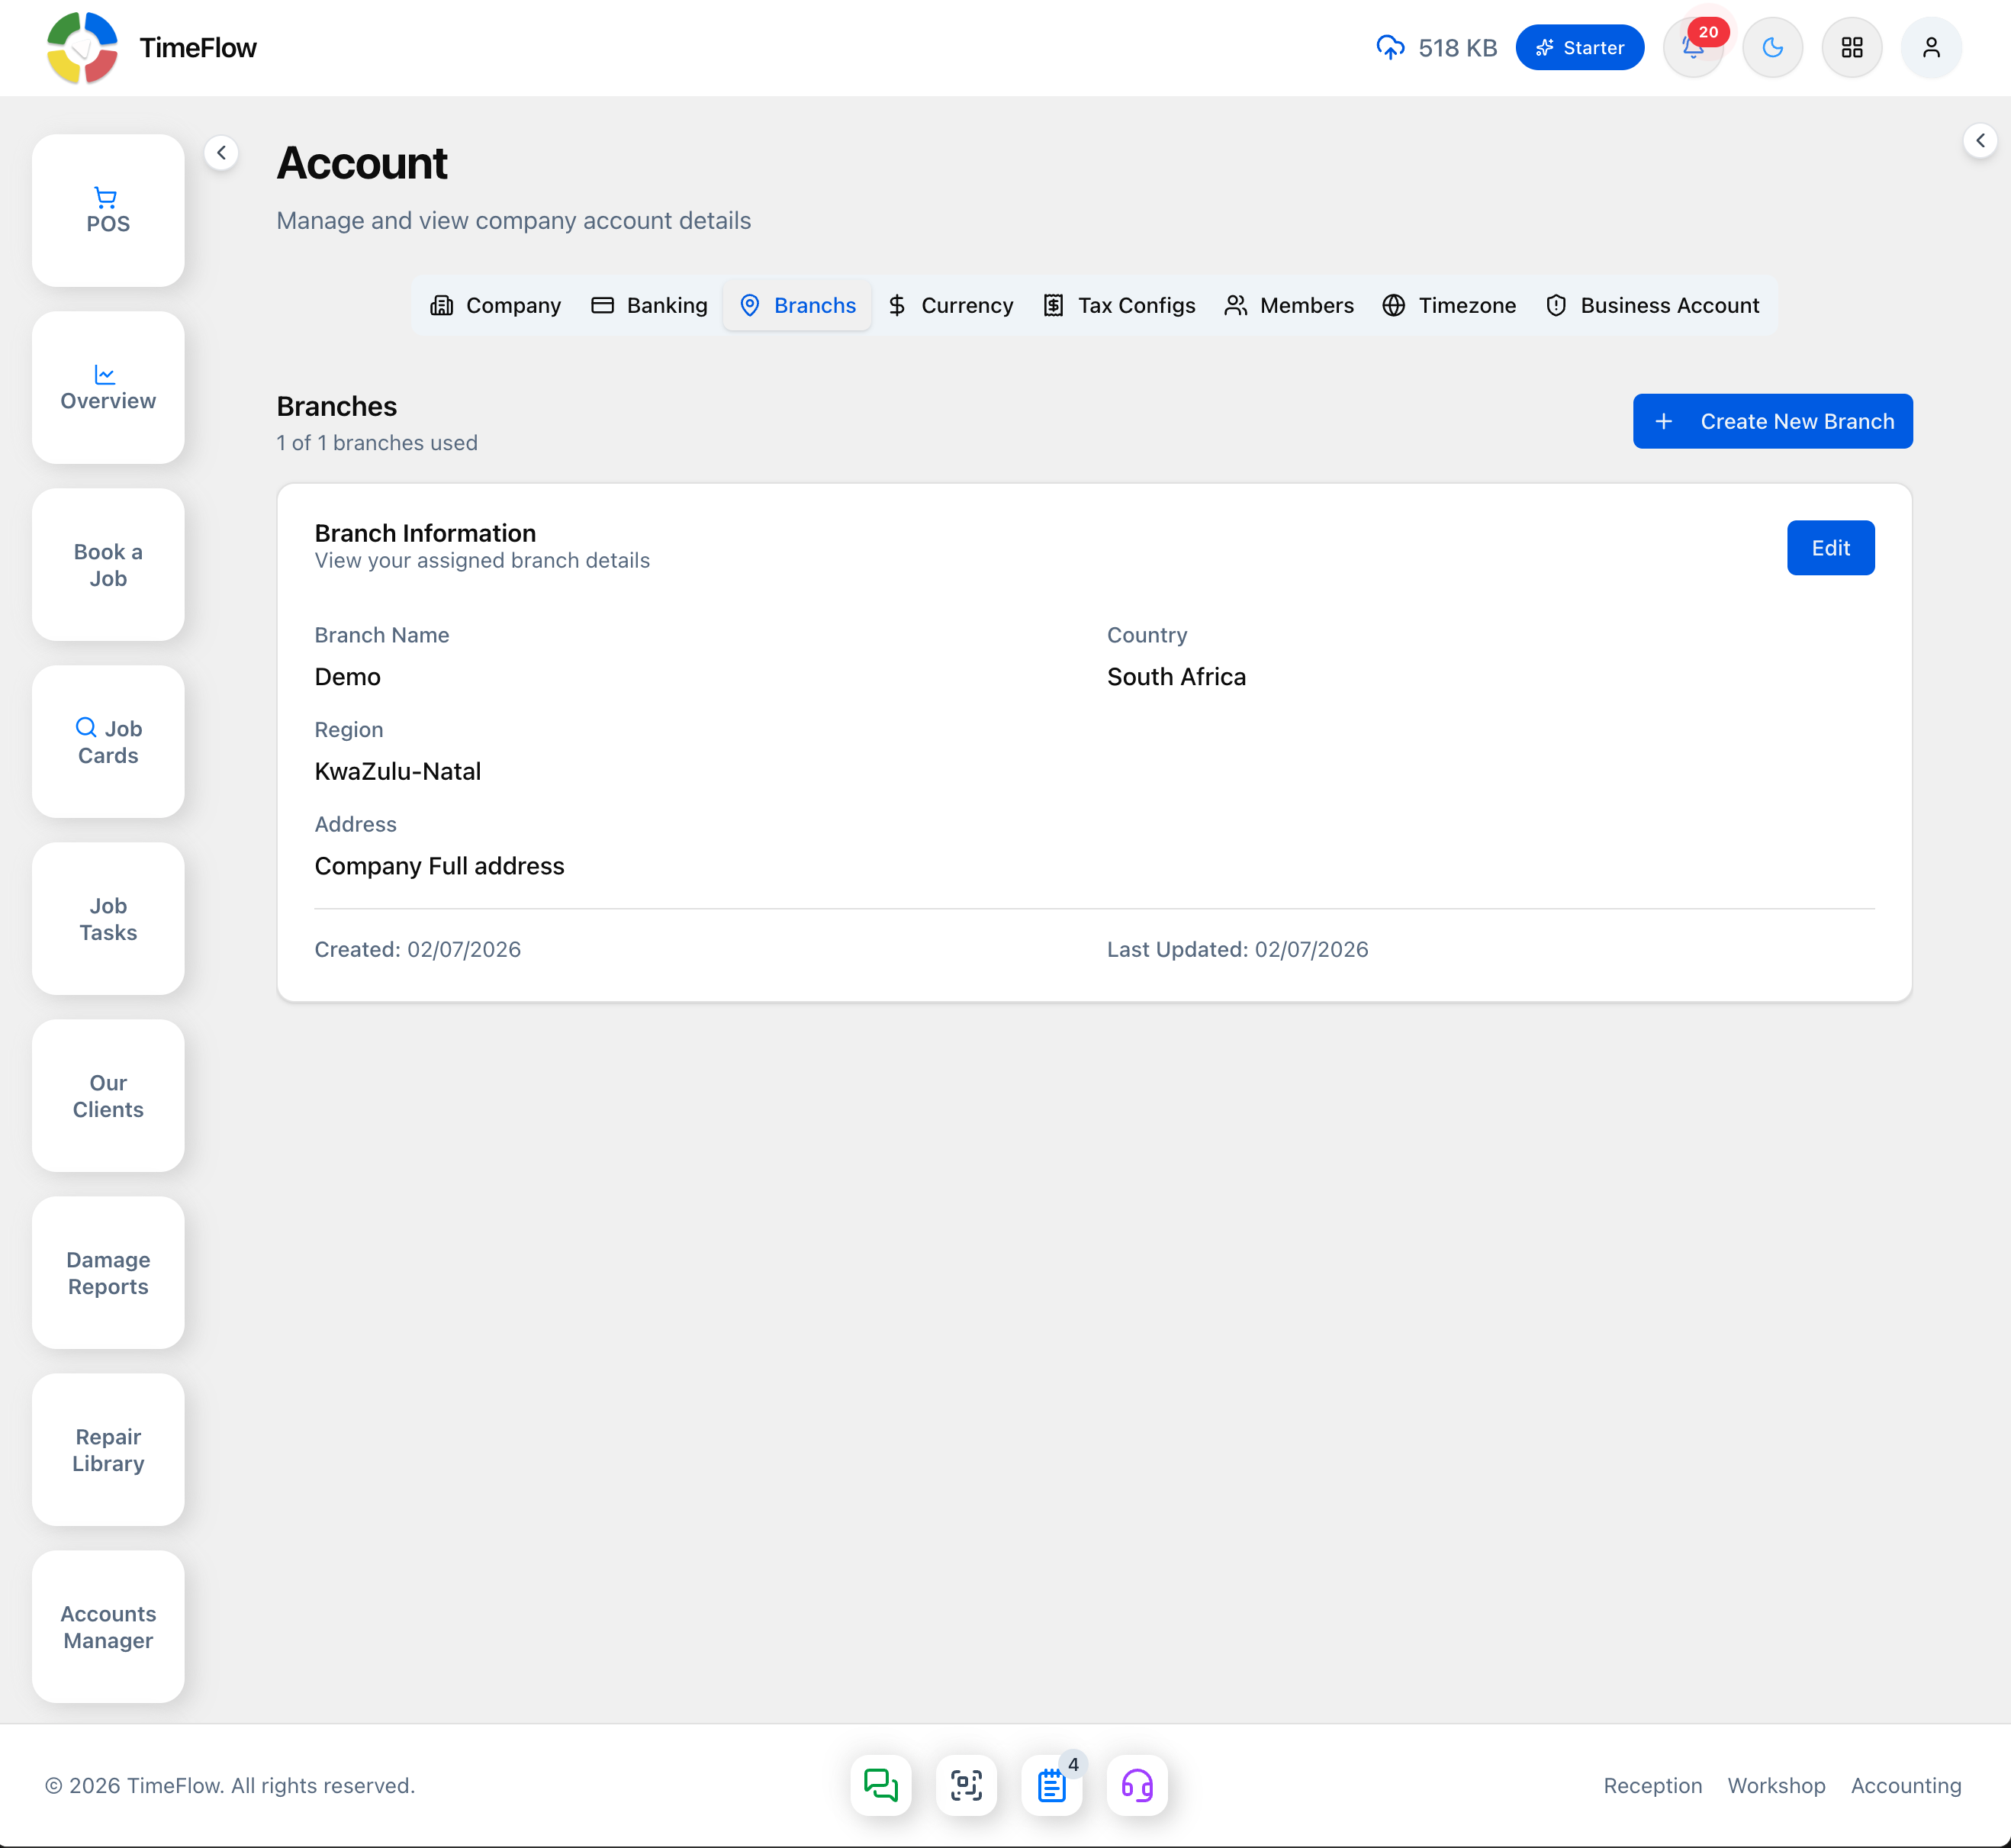
View and manage your branches — a "1 of N branches used" counter shows against your subscription's branch limit. Click Create New Branch and fill in Branch Name, Country, Region/State (from a list, or type your own), and Address. If you're already at your plan's branch limit, an Upgrade Required dialog appears instead ("You have reached the maximum number of branches allowed for your current subscription plan (N branch(es)). Please upgrade your subscription to add more branches."), linking to Subscription & Billing. Click Edit on an existing branch to change the same fields.
Currency tab
Set your company's base currency — see the Multi-Currency guide for how base vs. document currency works.
Tax Configs tab
Configure VAT registration and rates — see the Tax Reports & VAT Settings guide for the full field list.
Members tab
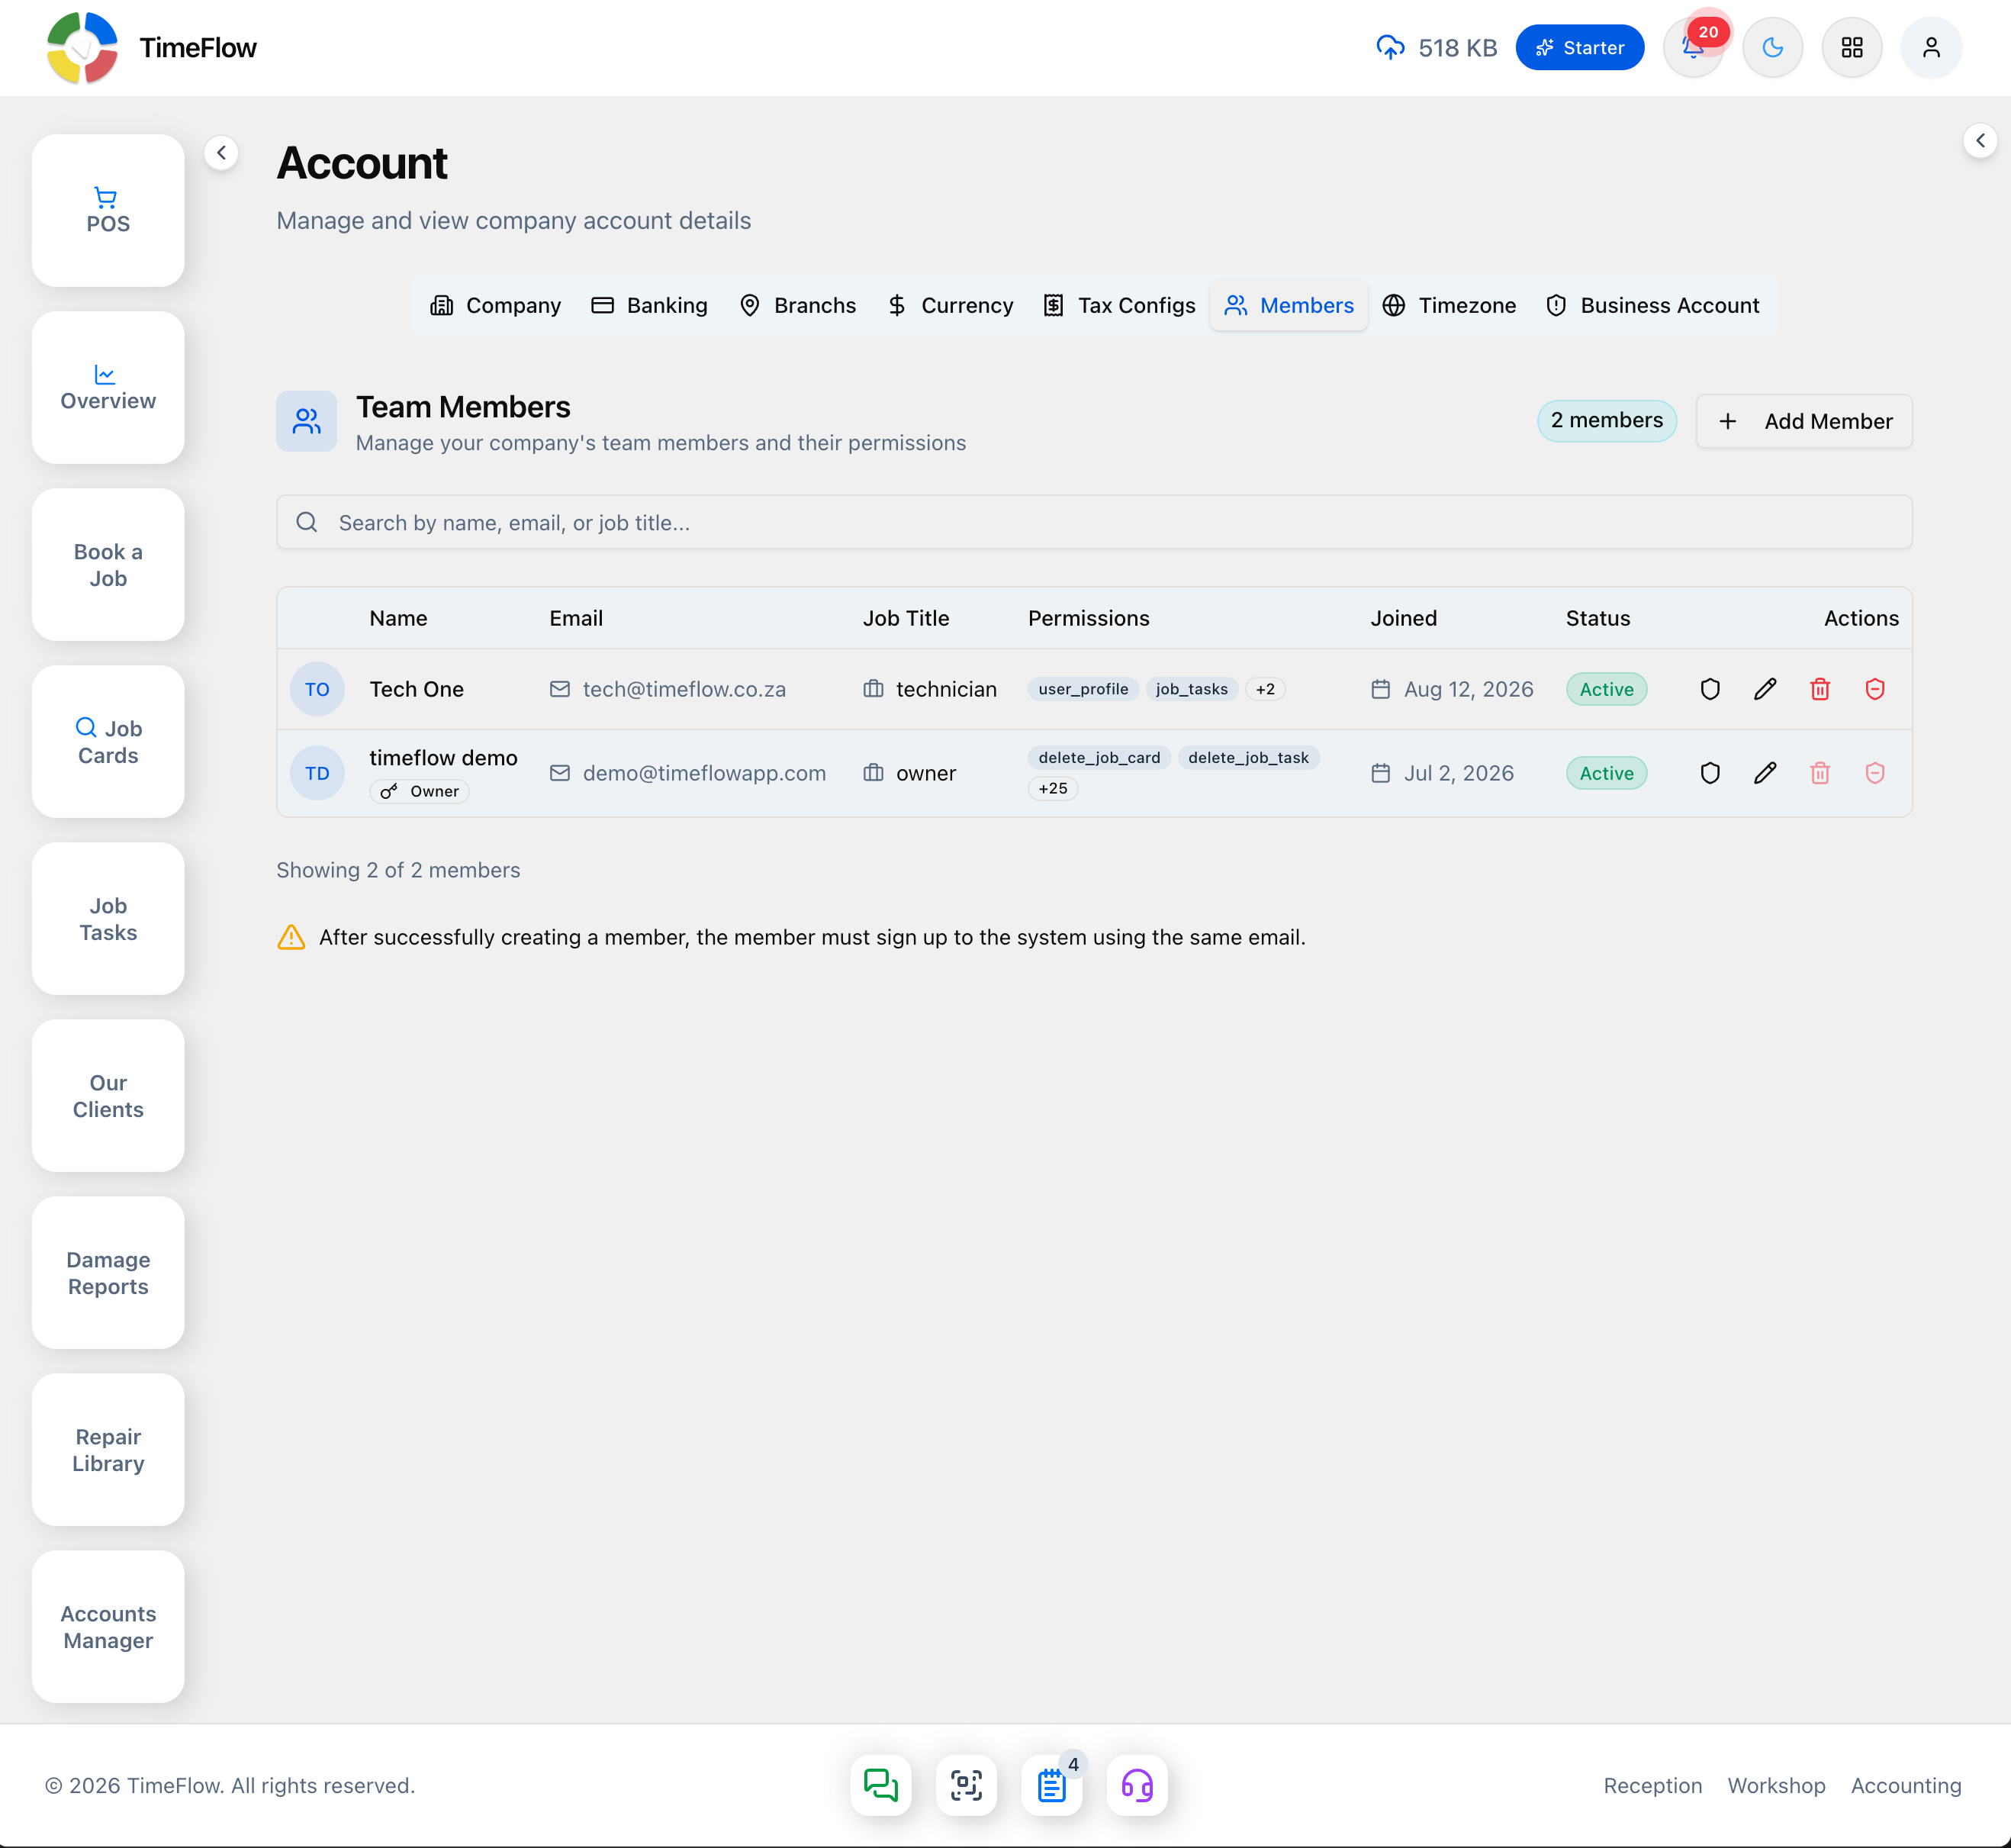
The Team Members card shows a member count badge (e.g. "2 members") and an Add Member button, above a Search by name, email, or job title... box and a table (Name, Email, Job Title, Permissions — shown as badges, e.g. user_profile job_tasks +2 — Joined, Status, Actions). A note under the table reads: "After successfully creating a member, the member must sign up to the system using the same email."
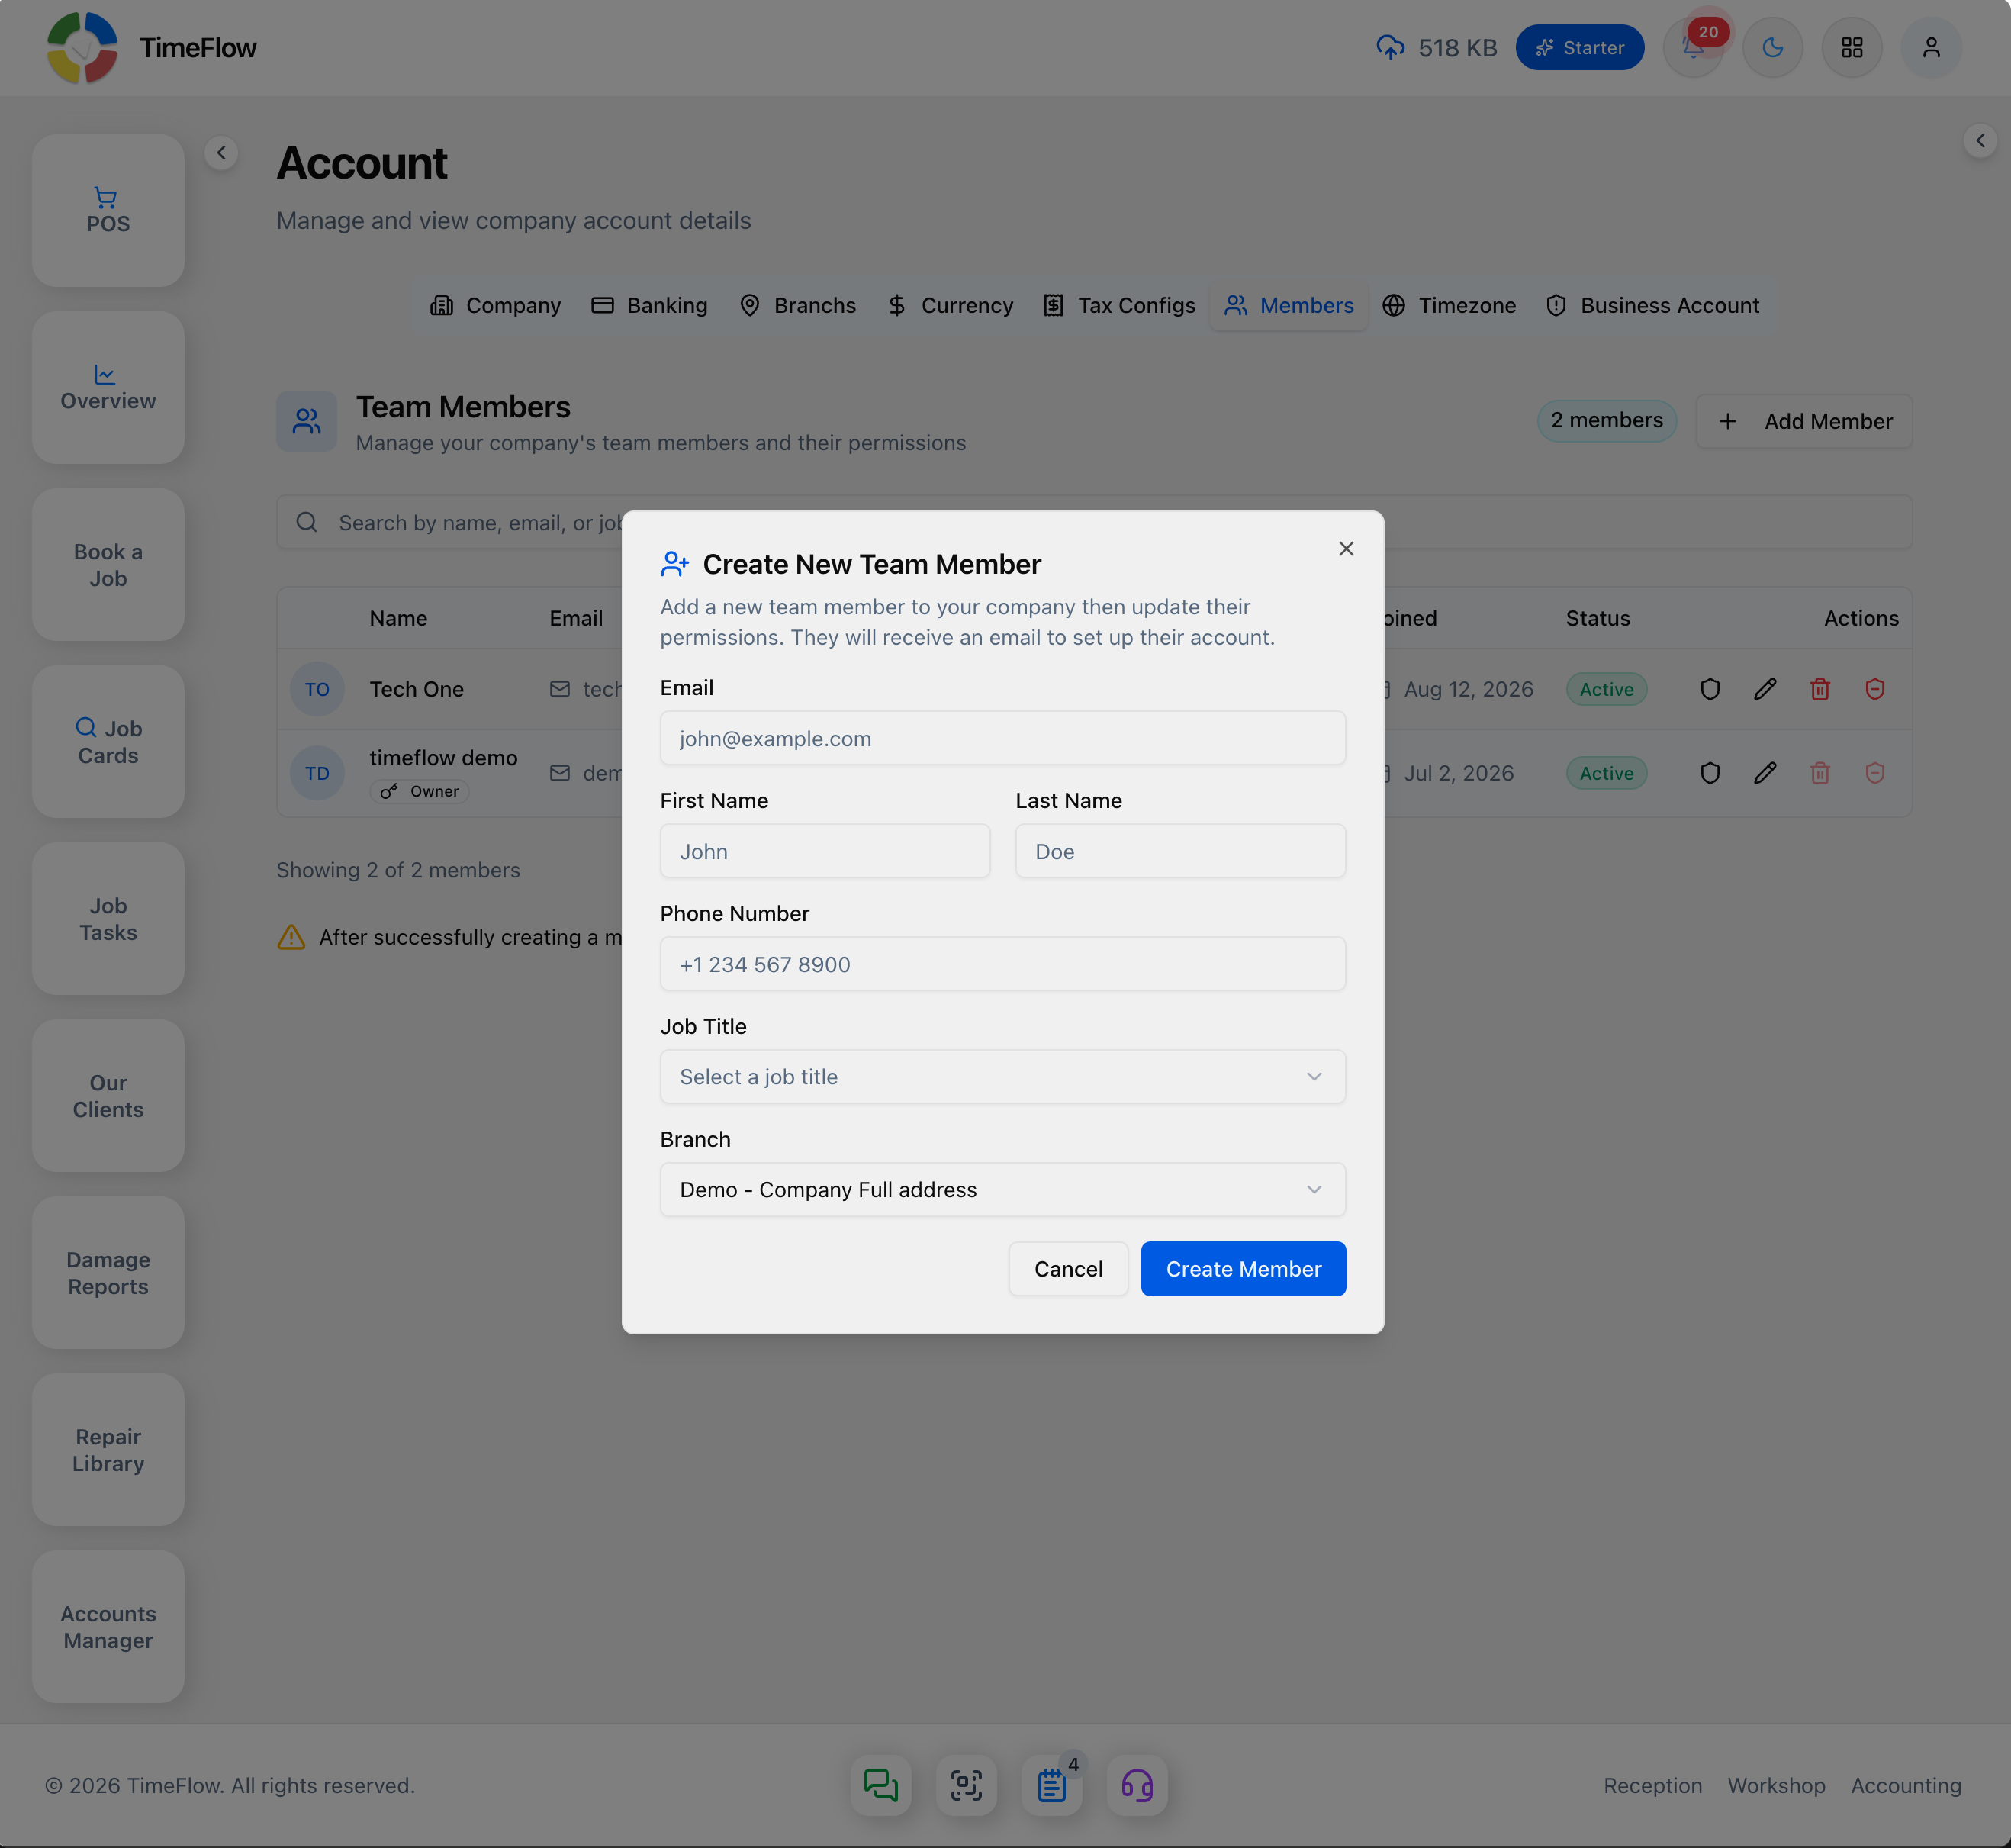
- Add Member opens a Create New Team Member dialog ("Add a new team member to your company then update their permissions. They will receive an email to set up their account."): Email, First Name, Last Name, Phone Number, Job Title (dropdown), and Branch (dropdown). Click Create Member. If you've hit your subscription's seat limit, an Upgrade Required dialog appears instead, linking to Subscription & Billing.
- Edit (pencil icon) a member to change their First Name, Last Name, Email, Job Title, or Phone Number (the owner's job title can't be changed here).
- Manage Permissions opens a dedicated dialog to fine-tune what that member can access, beyond their job title's defaults.
- Deactivate/Activate bans or restores a member's ability to log in, without deleting their data.
- Delete permanently removes a member and all their data and permissions — only the owner can do this, and it can't be undone.
Timezone tab
Shows your Current Company Timezone and Current Local Time, with an Update Company Timezone dropdown grouped by region.
Business Account tab (owner only)
Request deletion of the entire company account. Non-owners see a notice that only the owner can do this. For the owner:
- Request deletion starts the process and generates a confirmation token.
- Confirm deletion — re-enter your password and the token to proceed; this is irreversible.
- Cancel request — stop a pending deletion before it's confirmed.
- A Danger Zone card holds the request-deletion action, separated from the rest of the page.
Tips
- Set your Company, Banking, and Tax Configs details before sending your first invoice or quotation — they print directly on those documents.
- Deactivating a member is safer than deleting when someone leaves temporarily or you're unsure — you can reactivate them later with all their history intact.
Frequently asked questions
How do I add a staff member in TimeFlow?
Go to profile menu → Company Account → Members, click Add Member, and enter their email, name, phone, job title, and branch. They then sign up using the same email, and you can fine-tune their access with Manage Permissions.
Should I deactivate or delete a team member who leaves?
Deactivating blocks their login but keeps all their history, and can be reversed. Deleting permanently removes the member and their data, can only be done by the owner, and cannot be undone.
Related guides
- Subscription & billingView your TimeFlow plan, switch between Starter and Professional, update your payment card via PayFast, and download invoices from your payment history.
- VAT settings & tax reportsConfigure VAT (e.g. South Africa's 15%) with registration, rates, and reporting period, then review output and input tax entries and tax periods.
- Multi-currencySet your base currency and issue invoices, quotes, POs, and credit notes in other currencies with exchange rates, while reports stay in base currency.