
Insurance Claims in TimeFlow
Track insurance claims linked to job cards — which jobs are tied to which claim, and the client/device/insurer details behind each one.
Updated · Reception & job cards
On this page
Before you start
You need reception permission.
Finding this in the UI
- Left sidebar → Job Cards doesn't lead here directly — instead, go to the Reception hub (
Dashboard → Reception, via the sidebar's Dashboard item or the footer's Reception link) and click the Total Claims metric card, or navigate directly to/dashboard/reception/insurance-claims. - There's no header or footer shortcut straight to Insurance Claims — go through the Reception hub.
Creating a claim
Claims aren't created from a standalone "new claim" form — they're created as part of booking a job card: on the New Booking form's Insurance Information section, enter a claim number, insurance company, claim consultant, and consultant contact number (or select an existing claim to link to). See the Booking a Job Card guide for the full field list.
Viewing and searching claims
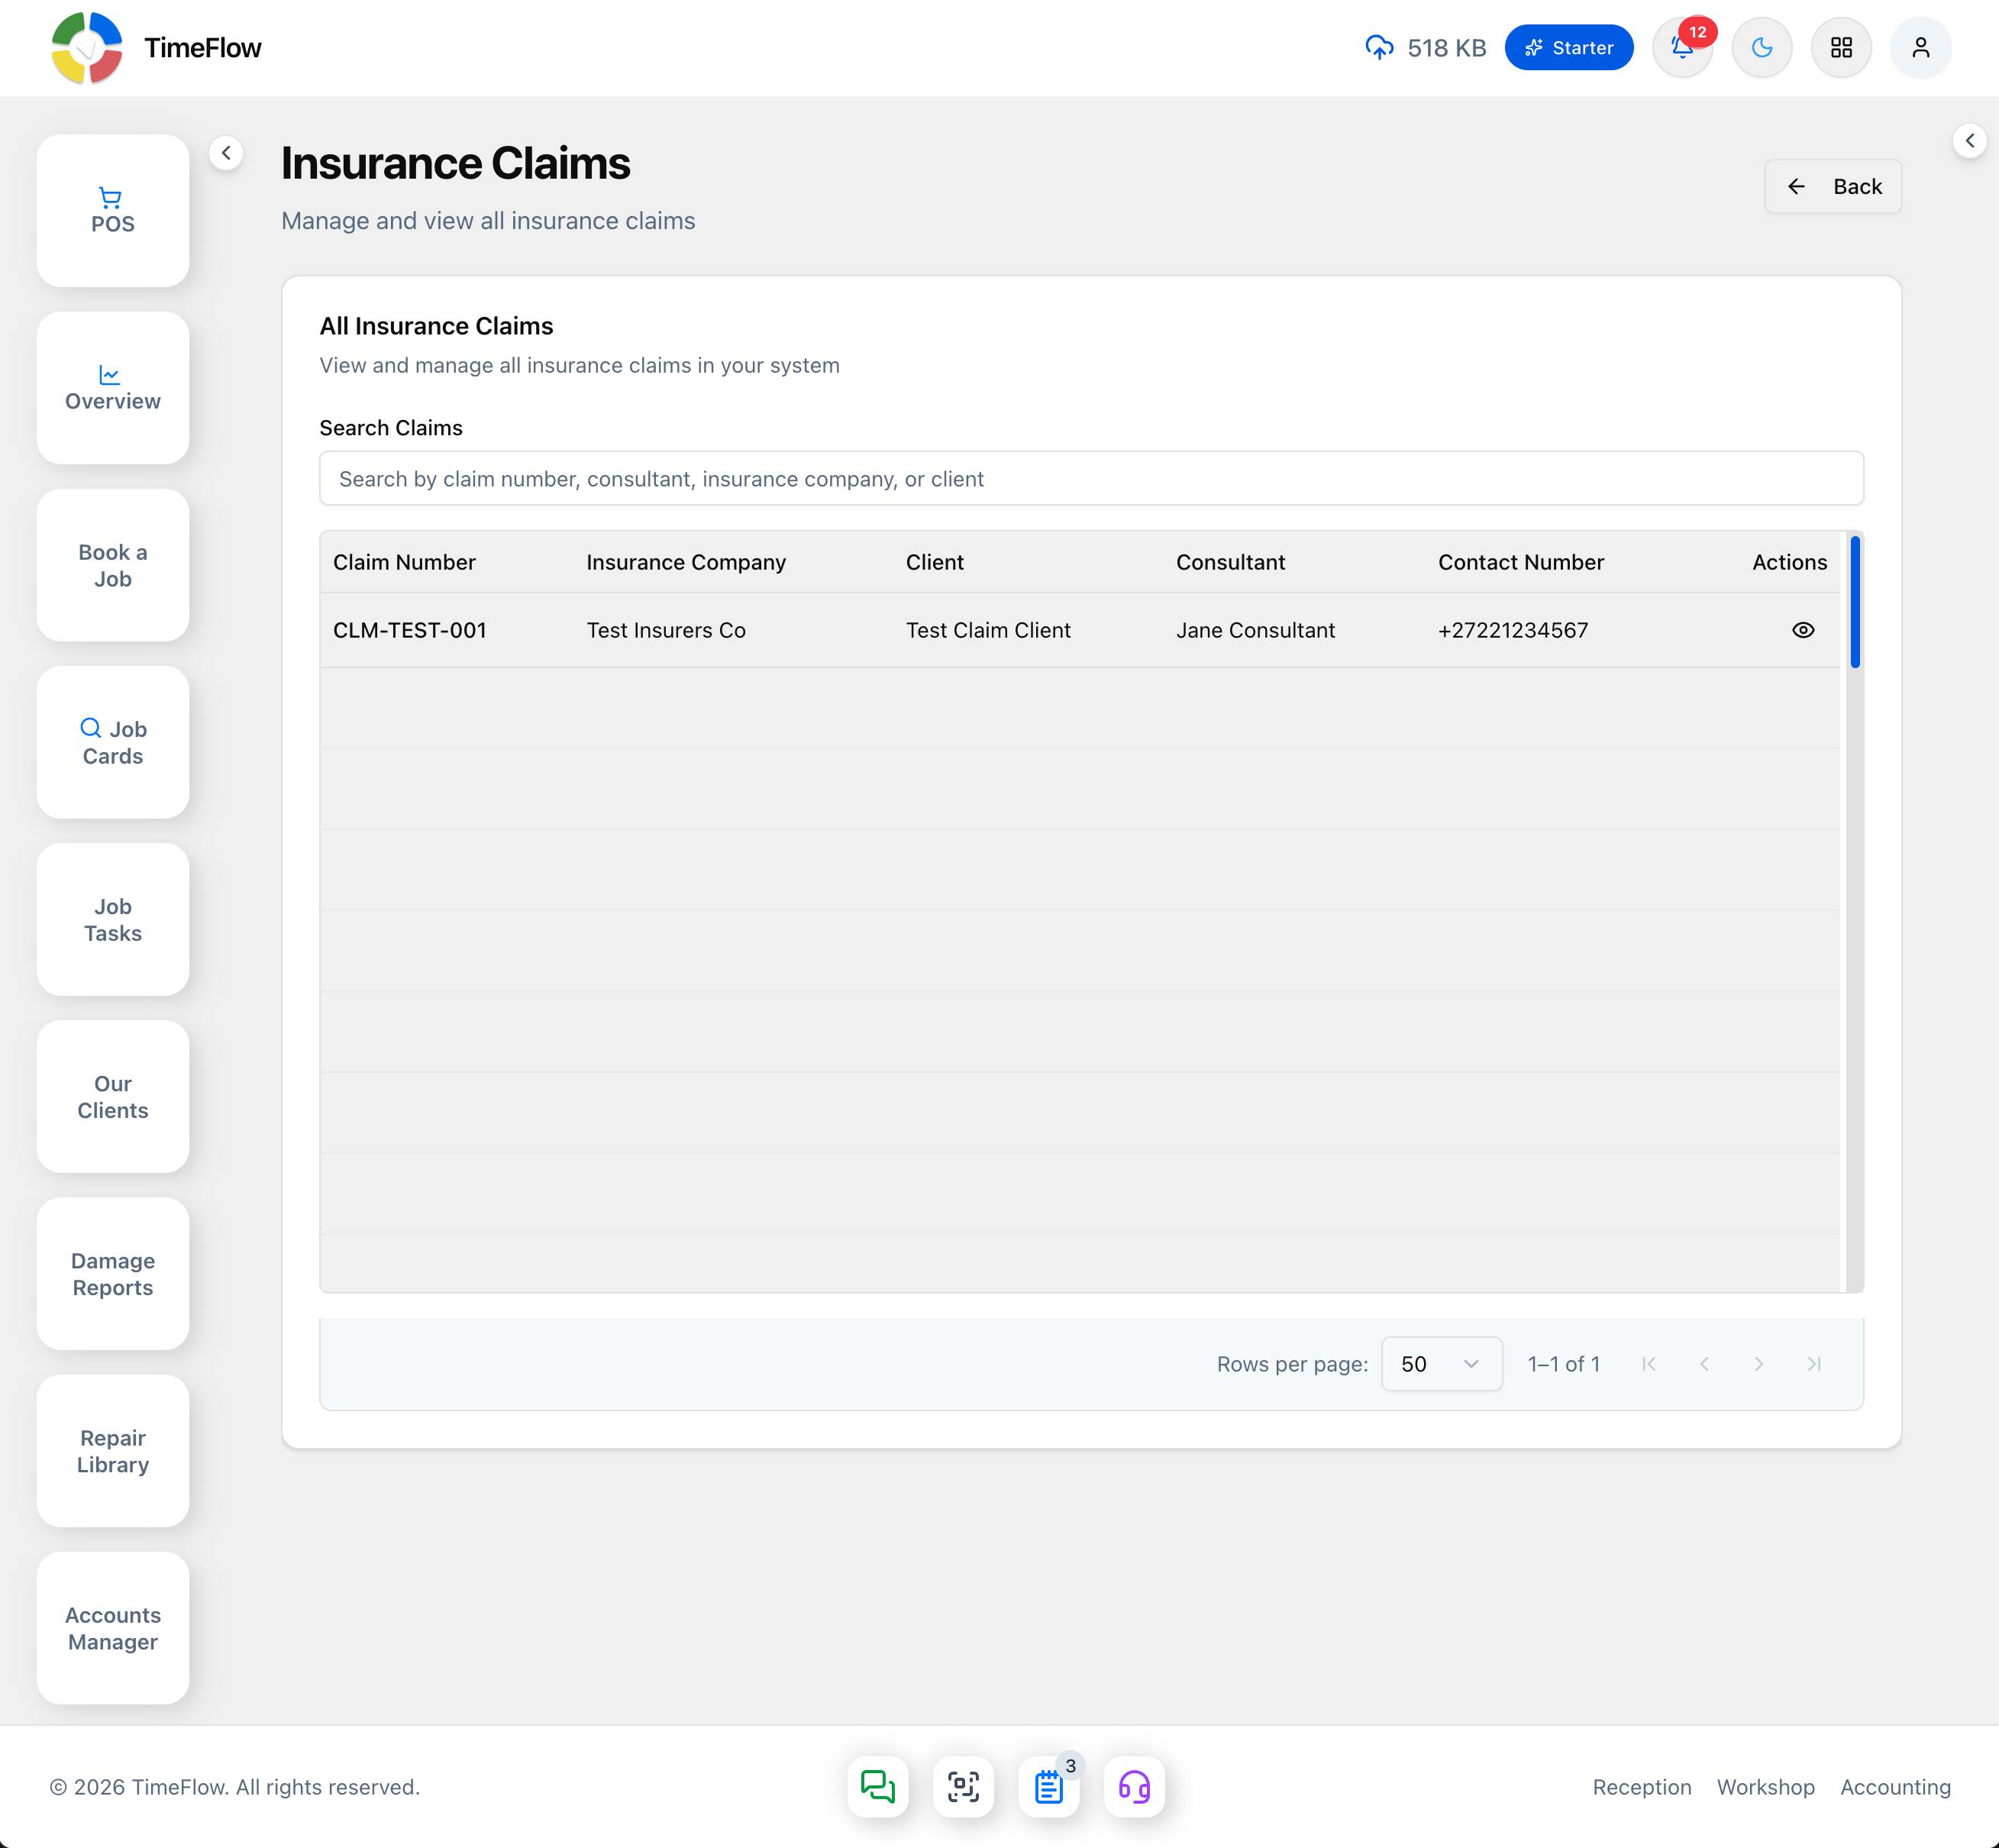
Go to Insurance Claims (/dashboard/reception/insurance-claims). A Search Claims box filters by claim number, consultant, insurance company, or client. The table lists Claim Number, Insurance Company, Client, Consultant, and Contact Number for every claim; click a row to open its detail page.
Claim details
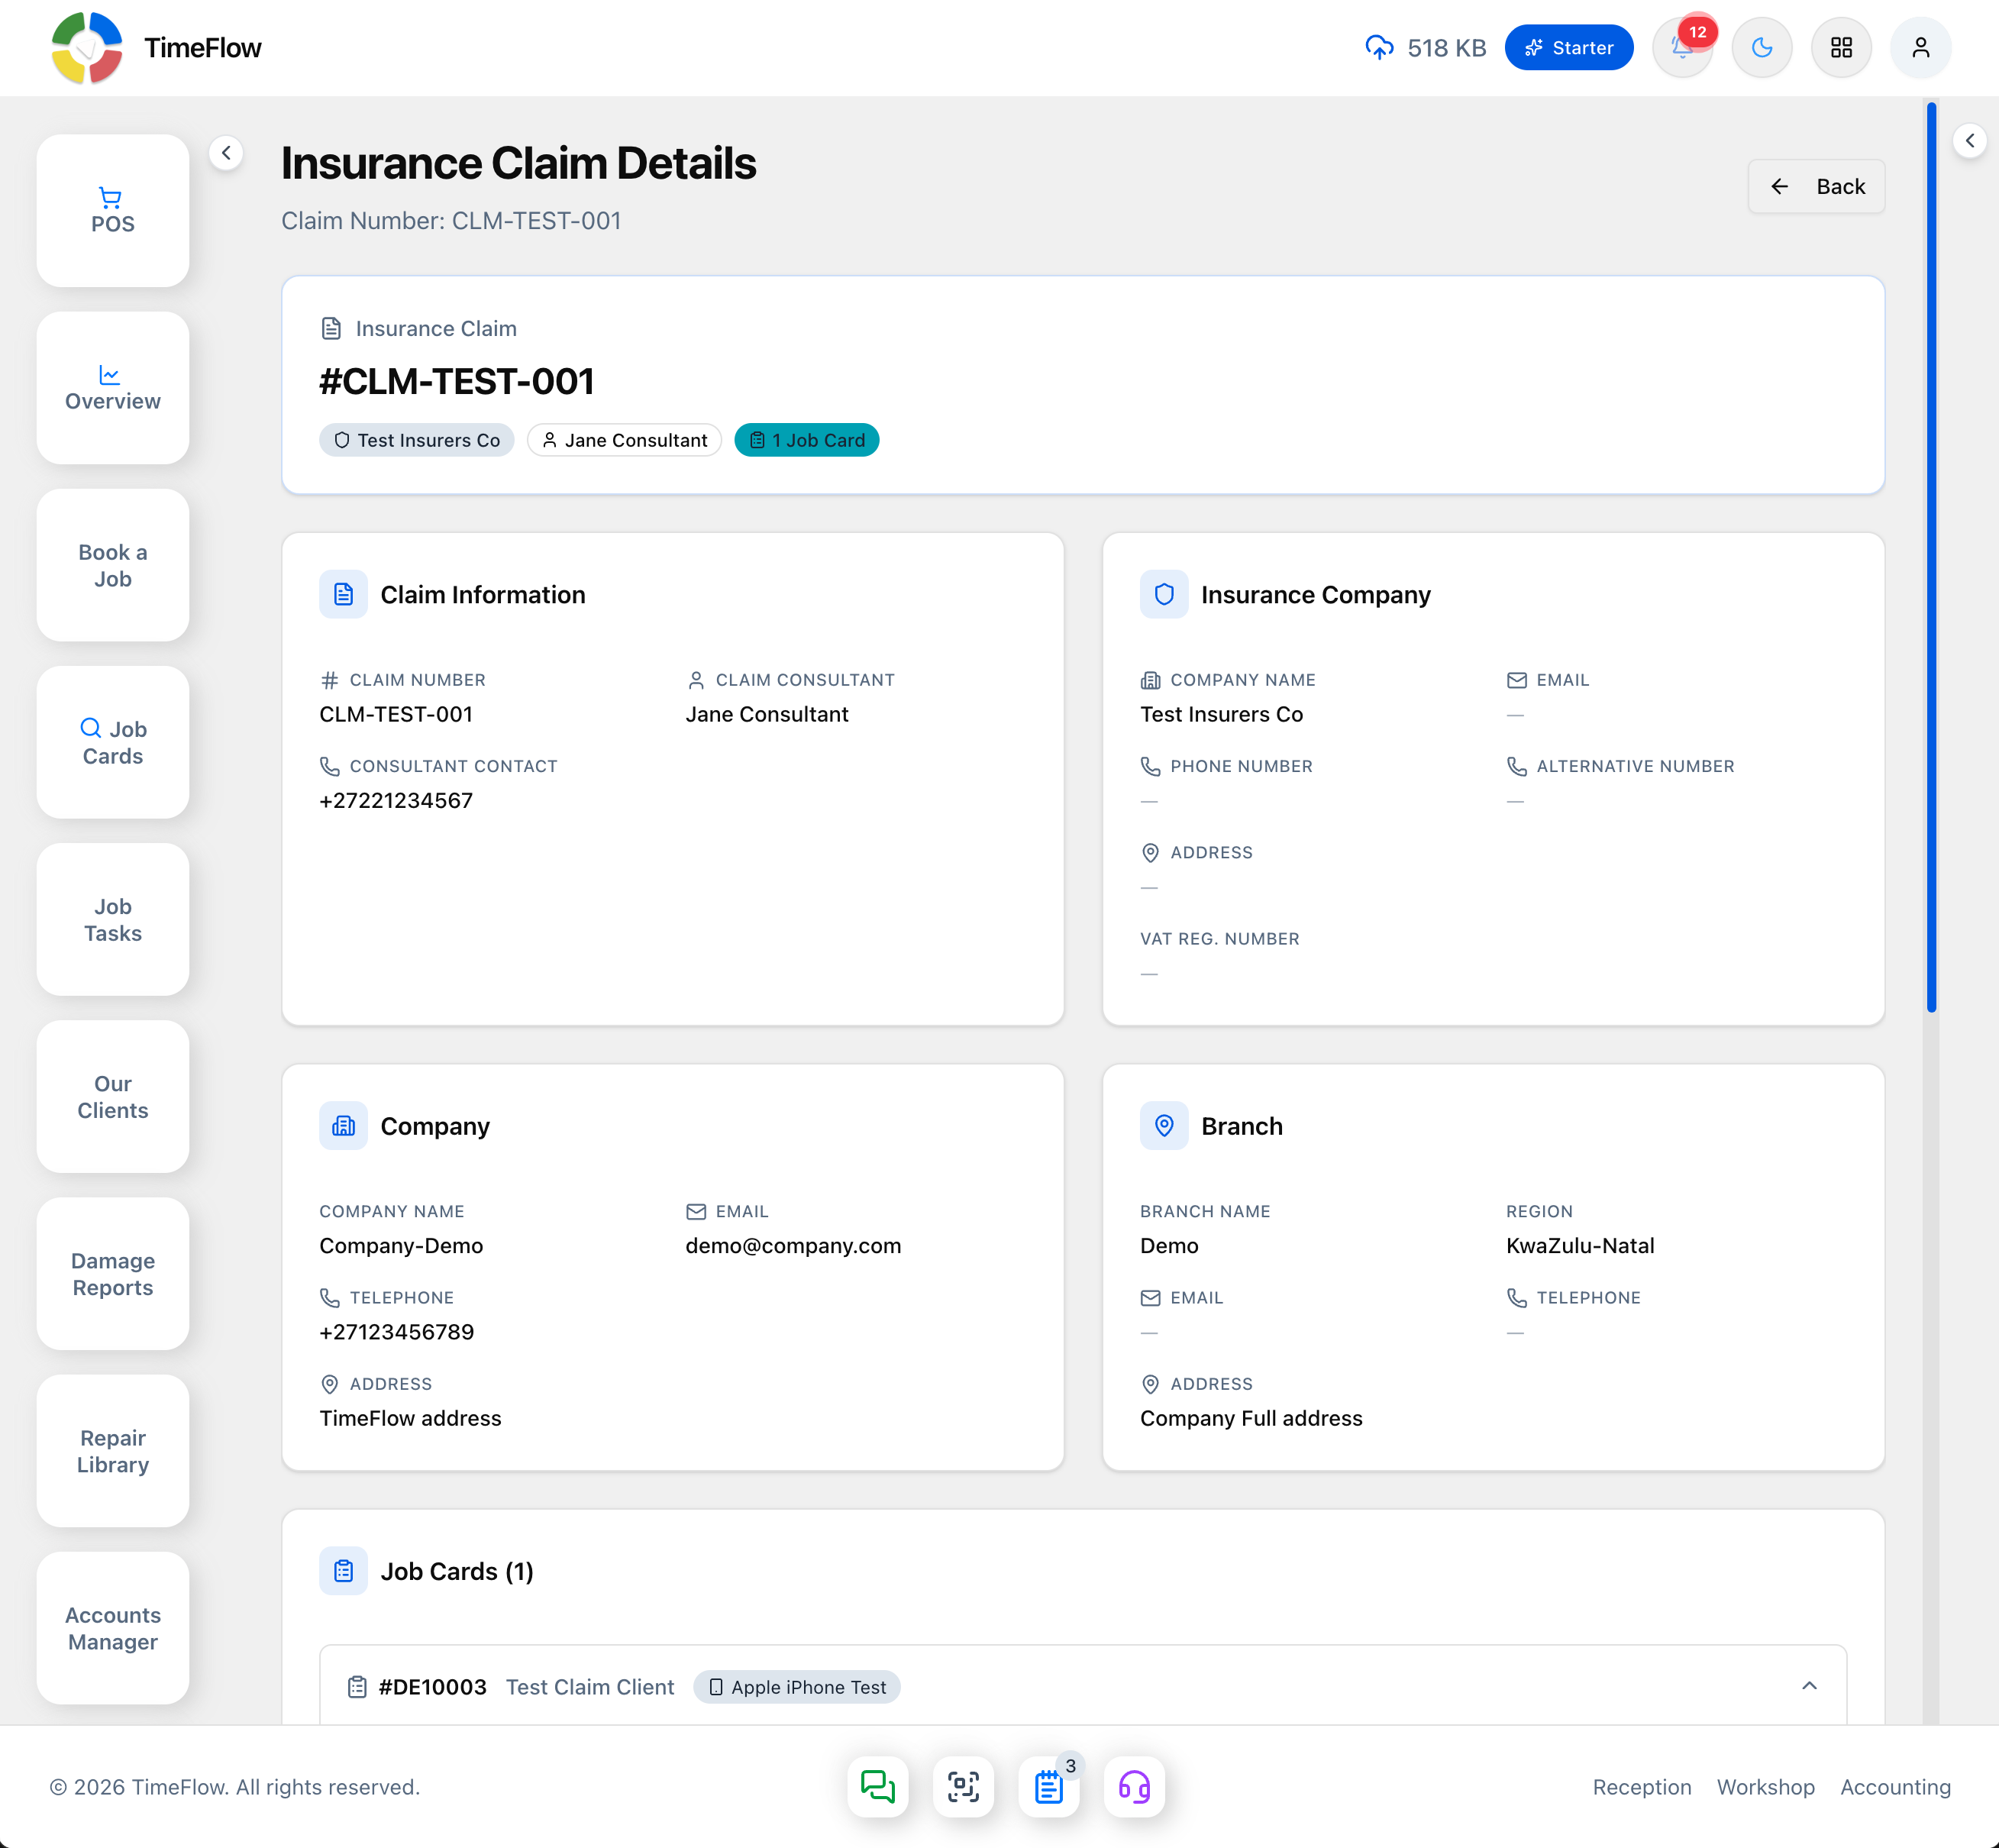
Each claim's detail page (/dashboard/reception/insurance-claims/[id]) shows:
- A header card with the claim number, and badges for the insurance company, claim consultant, and linked job-card count.
- Claim Information — Claim Number, Claim Consultant, Consultant Contact.
- Insurance Company — Company Name, Email, Phone Number, Alternative Number, Address, VAT Reg. Number.
- Company — your own company's name, email, telephone, and address (for reference on the claim).
- Branch — the branch name, region, email, telephone, and address the job was booked under.
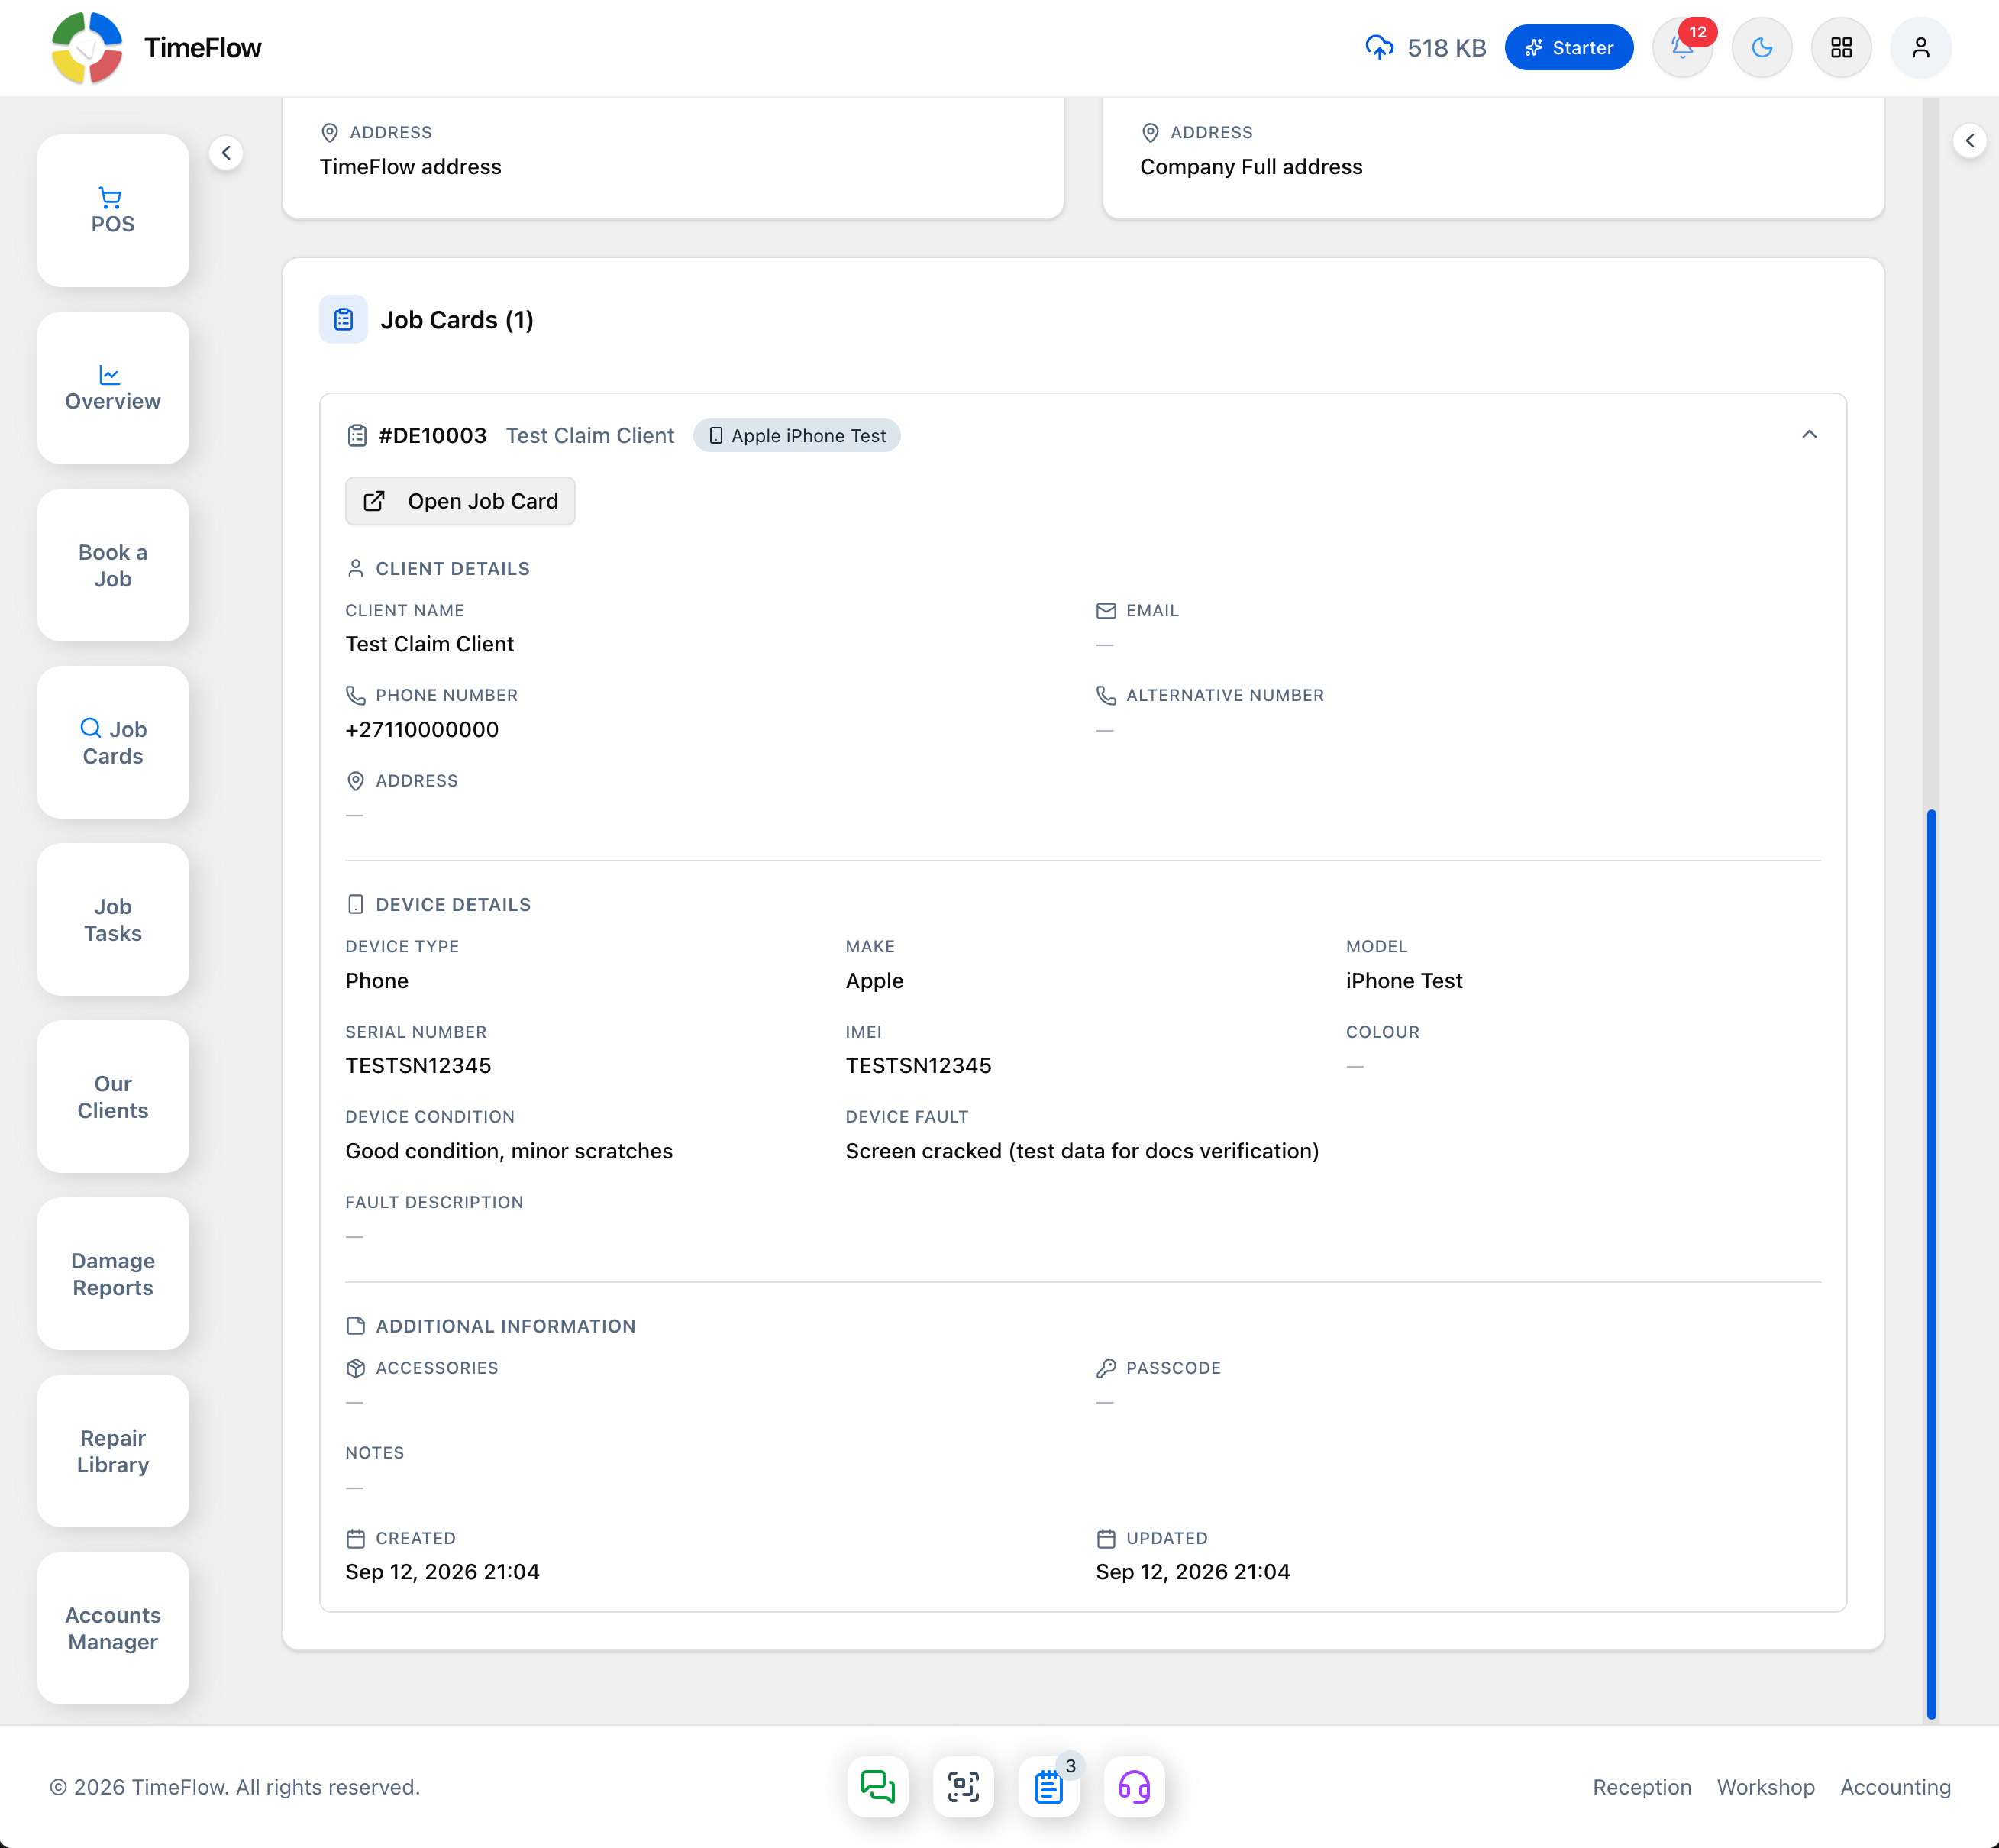
- Job Cards — every job card linked to that claim, listed as expandable rows headed by the job number, client name, and device. Expand one to see:
- An Open Job Card button that jumps straight to that job card.
- Client Details (name, email, phone, alternative number, address).
- Device Details (type, make, model, serial number, IMEI, colour, condition, fault, fault description).
- Additional Information (accessories, passcode, notes, created/updated timestamps).
Use Back (top of the page) to return to the claims list.
Tips
- A single claim can have multiple job cards linked to it — useful when an insurer is covering more than one item or repeat visit.
- Since claims are created from the booking form, make sure claim numbers are entered consistently (or picked from the existing-claim search) so multiple job cards land under the same claim instead of creating duplicates.
Frequently asked questions
How do I create an insurance claim in TimeFlow?
Claims are created while booking a job card: fill in the Insurance Information section with the insurer, claim number, claim consultant, and contact number, or select an existing claim.
Can one insurance claim cover several job cards?
Yes. Select the existing claim number when booking each job card and they are all listed under that claim.
Related guides
- Booking a job cardBook a device or vehicle in for repair: create a digital job card with client details, IMEI/serial, condition, fault, insurance claim, and intake photos.
- Damage reportsCreate damage reports with photos against a job card task or insurance claim to record pre-existing damage and protect your repair shop from disputes.
- InvoicesCreate repair invoices for parts and labour with per-line VAT and discounts, link job cards and insurance claims, take payments, and post to the ledger.