
Managing Clients (Our Clients) in TimeFlow
The Our Clients page is where you keep a record of every customer and insurance company you deal with.
Updated · Reception & job cards
On this page
Before you start
You need reception or clients permission.
Finding this in the UI
- Left sidebar → Our Clients opens the page directly.
- From the Reception hub (
Dashboard → Reception, reachable via the sidebar's Dashboard item or the footer's Reception link), the Quick Actions section has a View button under "Our Clients." - The header and footer don't link here directly beyond the Reception hub route above.
Viewing clients
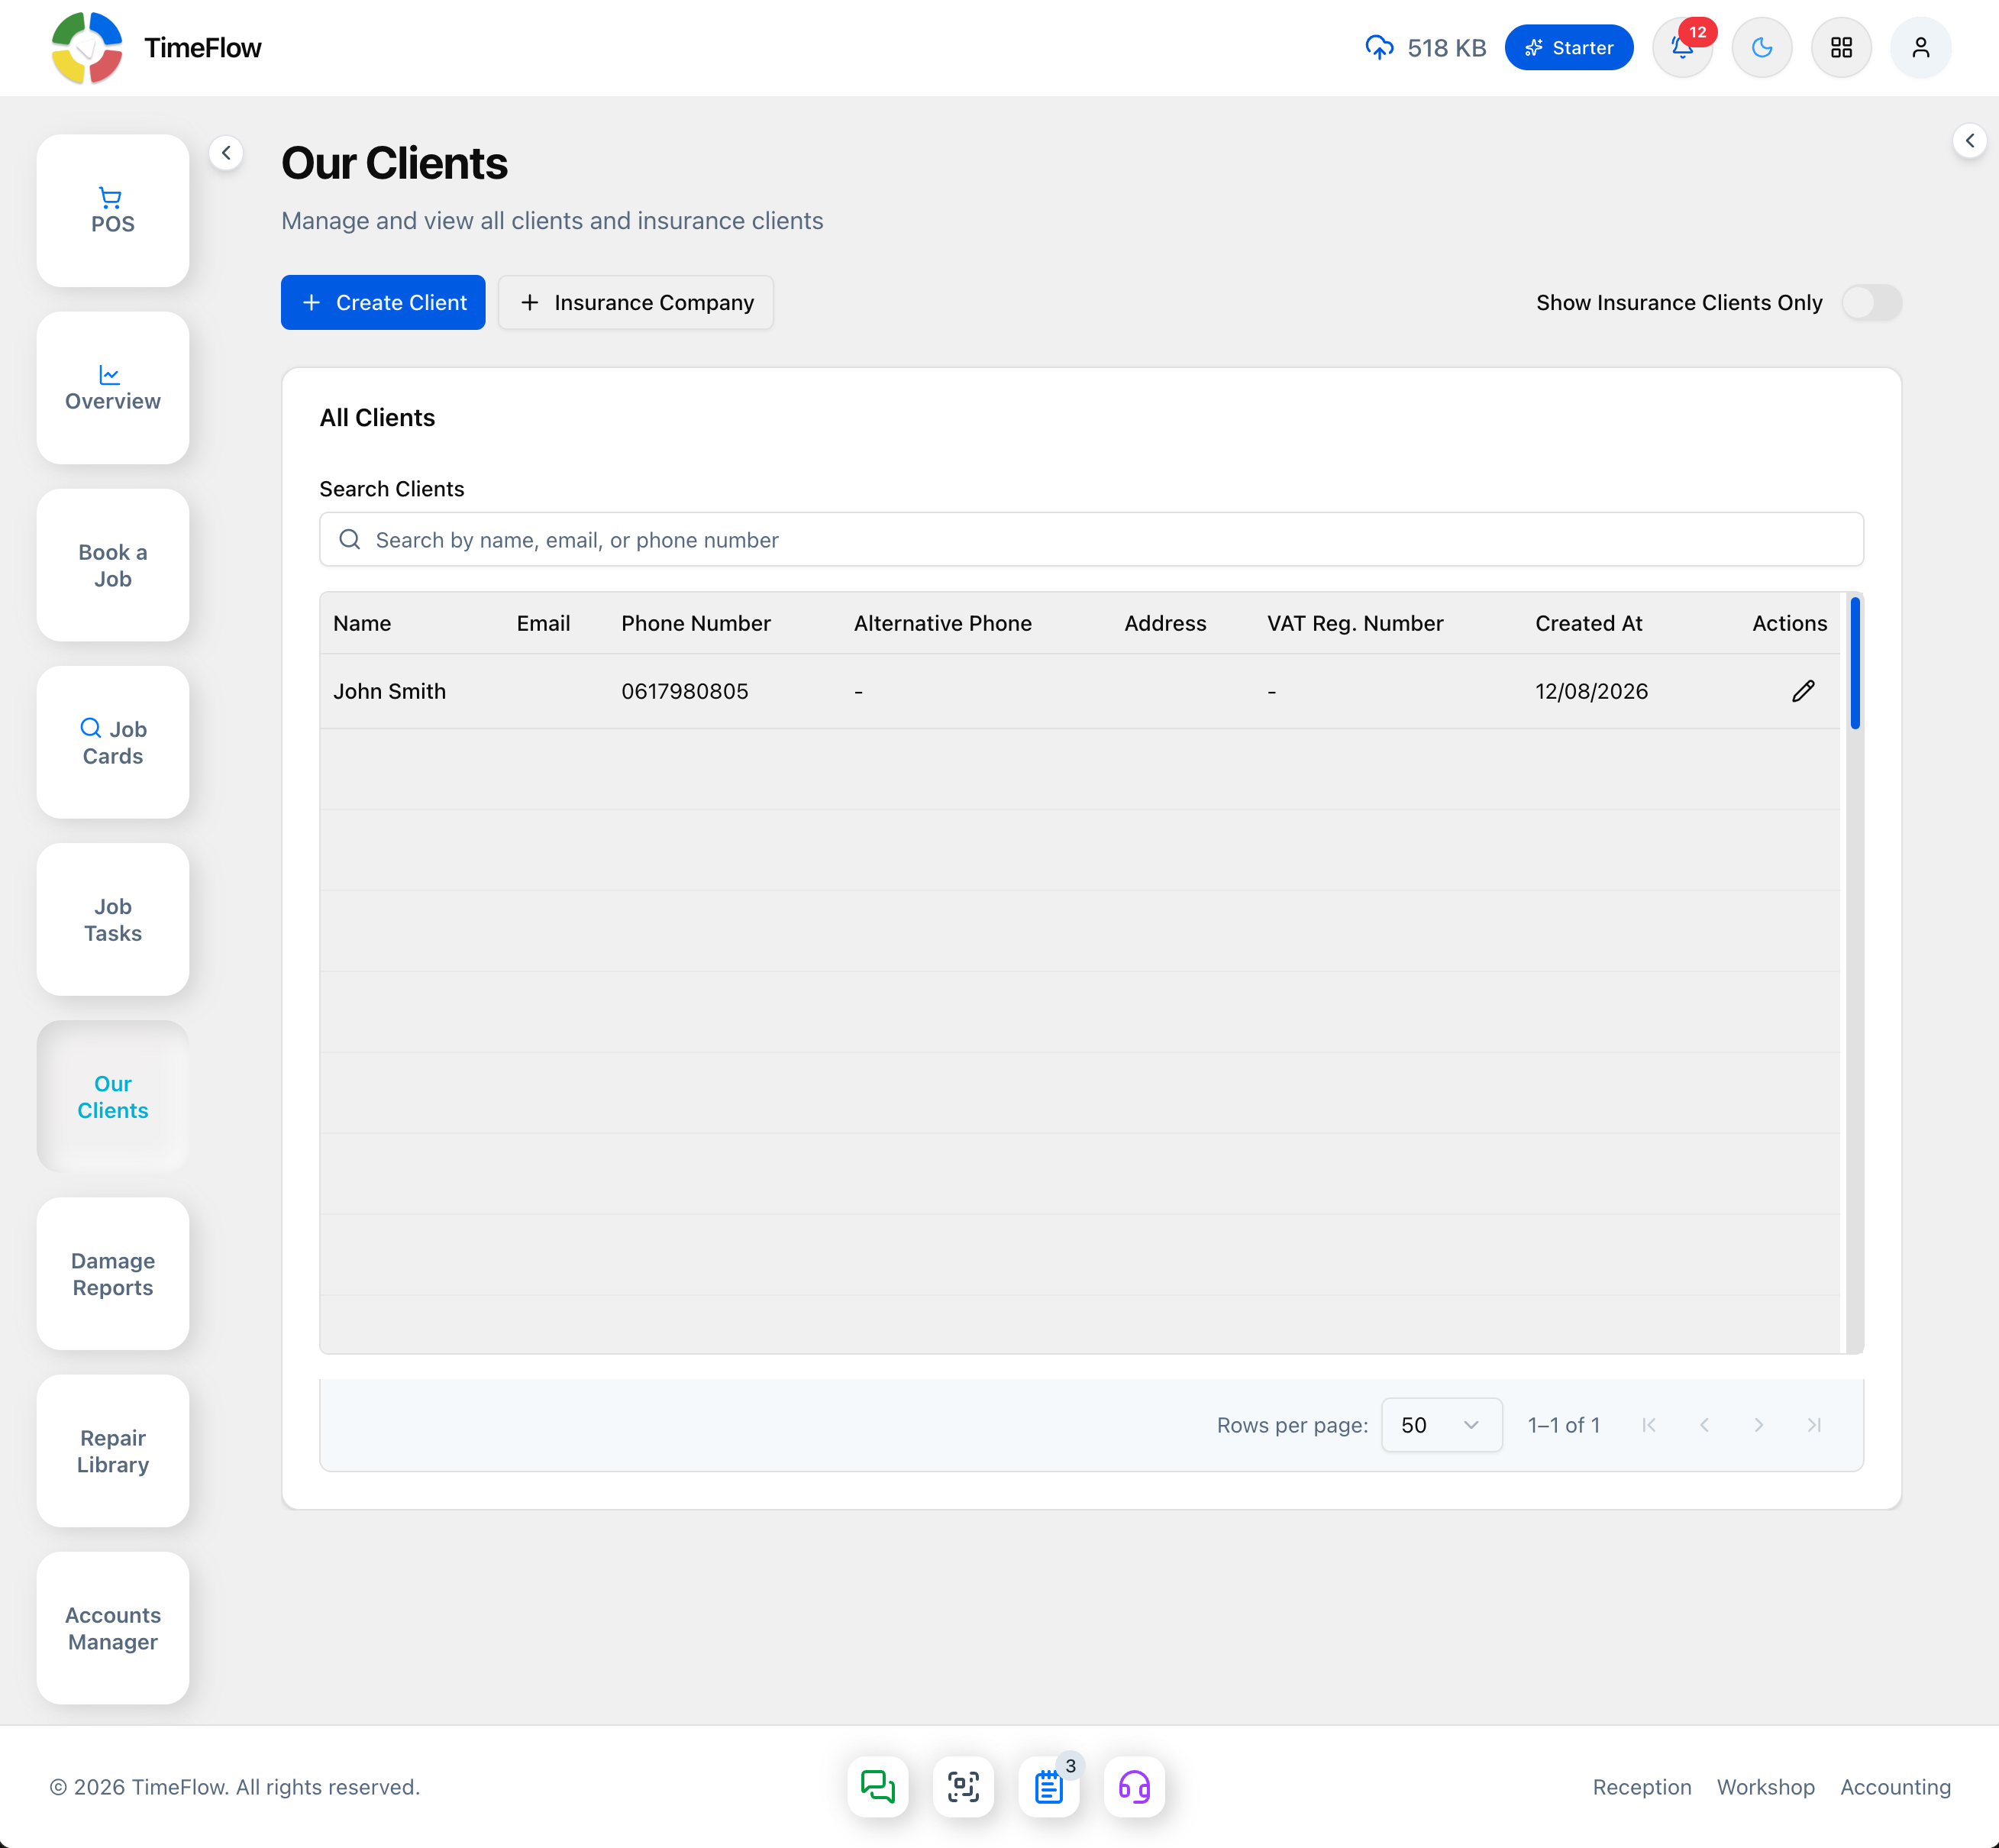
Go to Our Clients (/dashboard/reception/our-clients). By default the table lists all clients, with a Search Clients box to filter by name, email, or phone number. Flip the Show Insurance Clients Only switch (top right) to filter the table down to insurance companies only. Columns shown: Name, Email, Phone Number, Alternative Phone, Address, VAT Reg. Number, Created At, and an edit action.
Adding a client
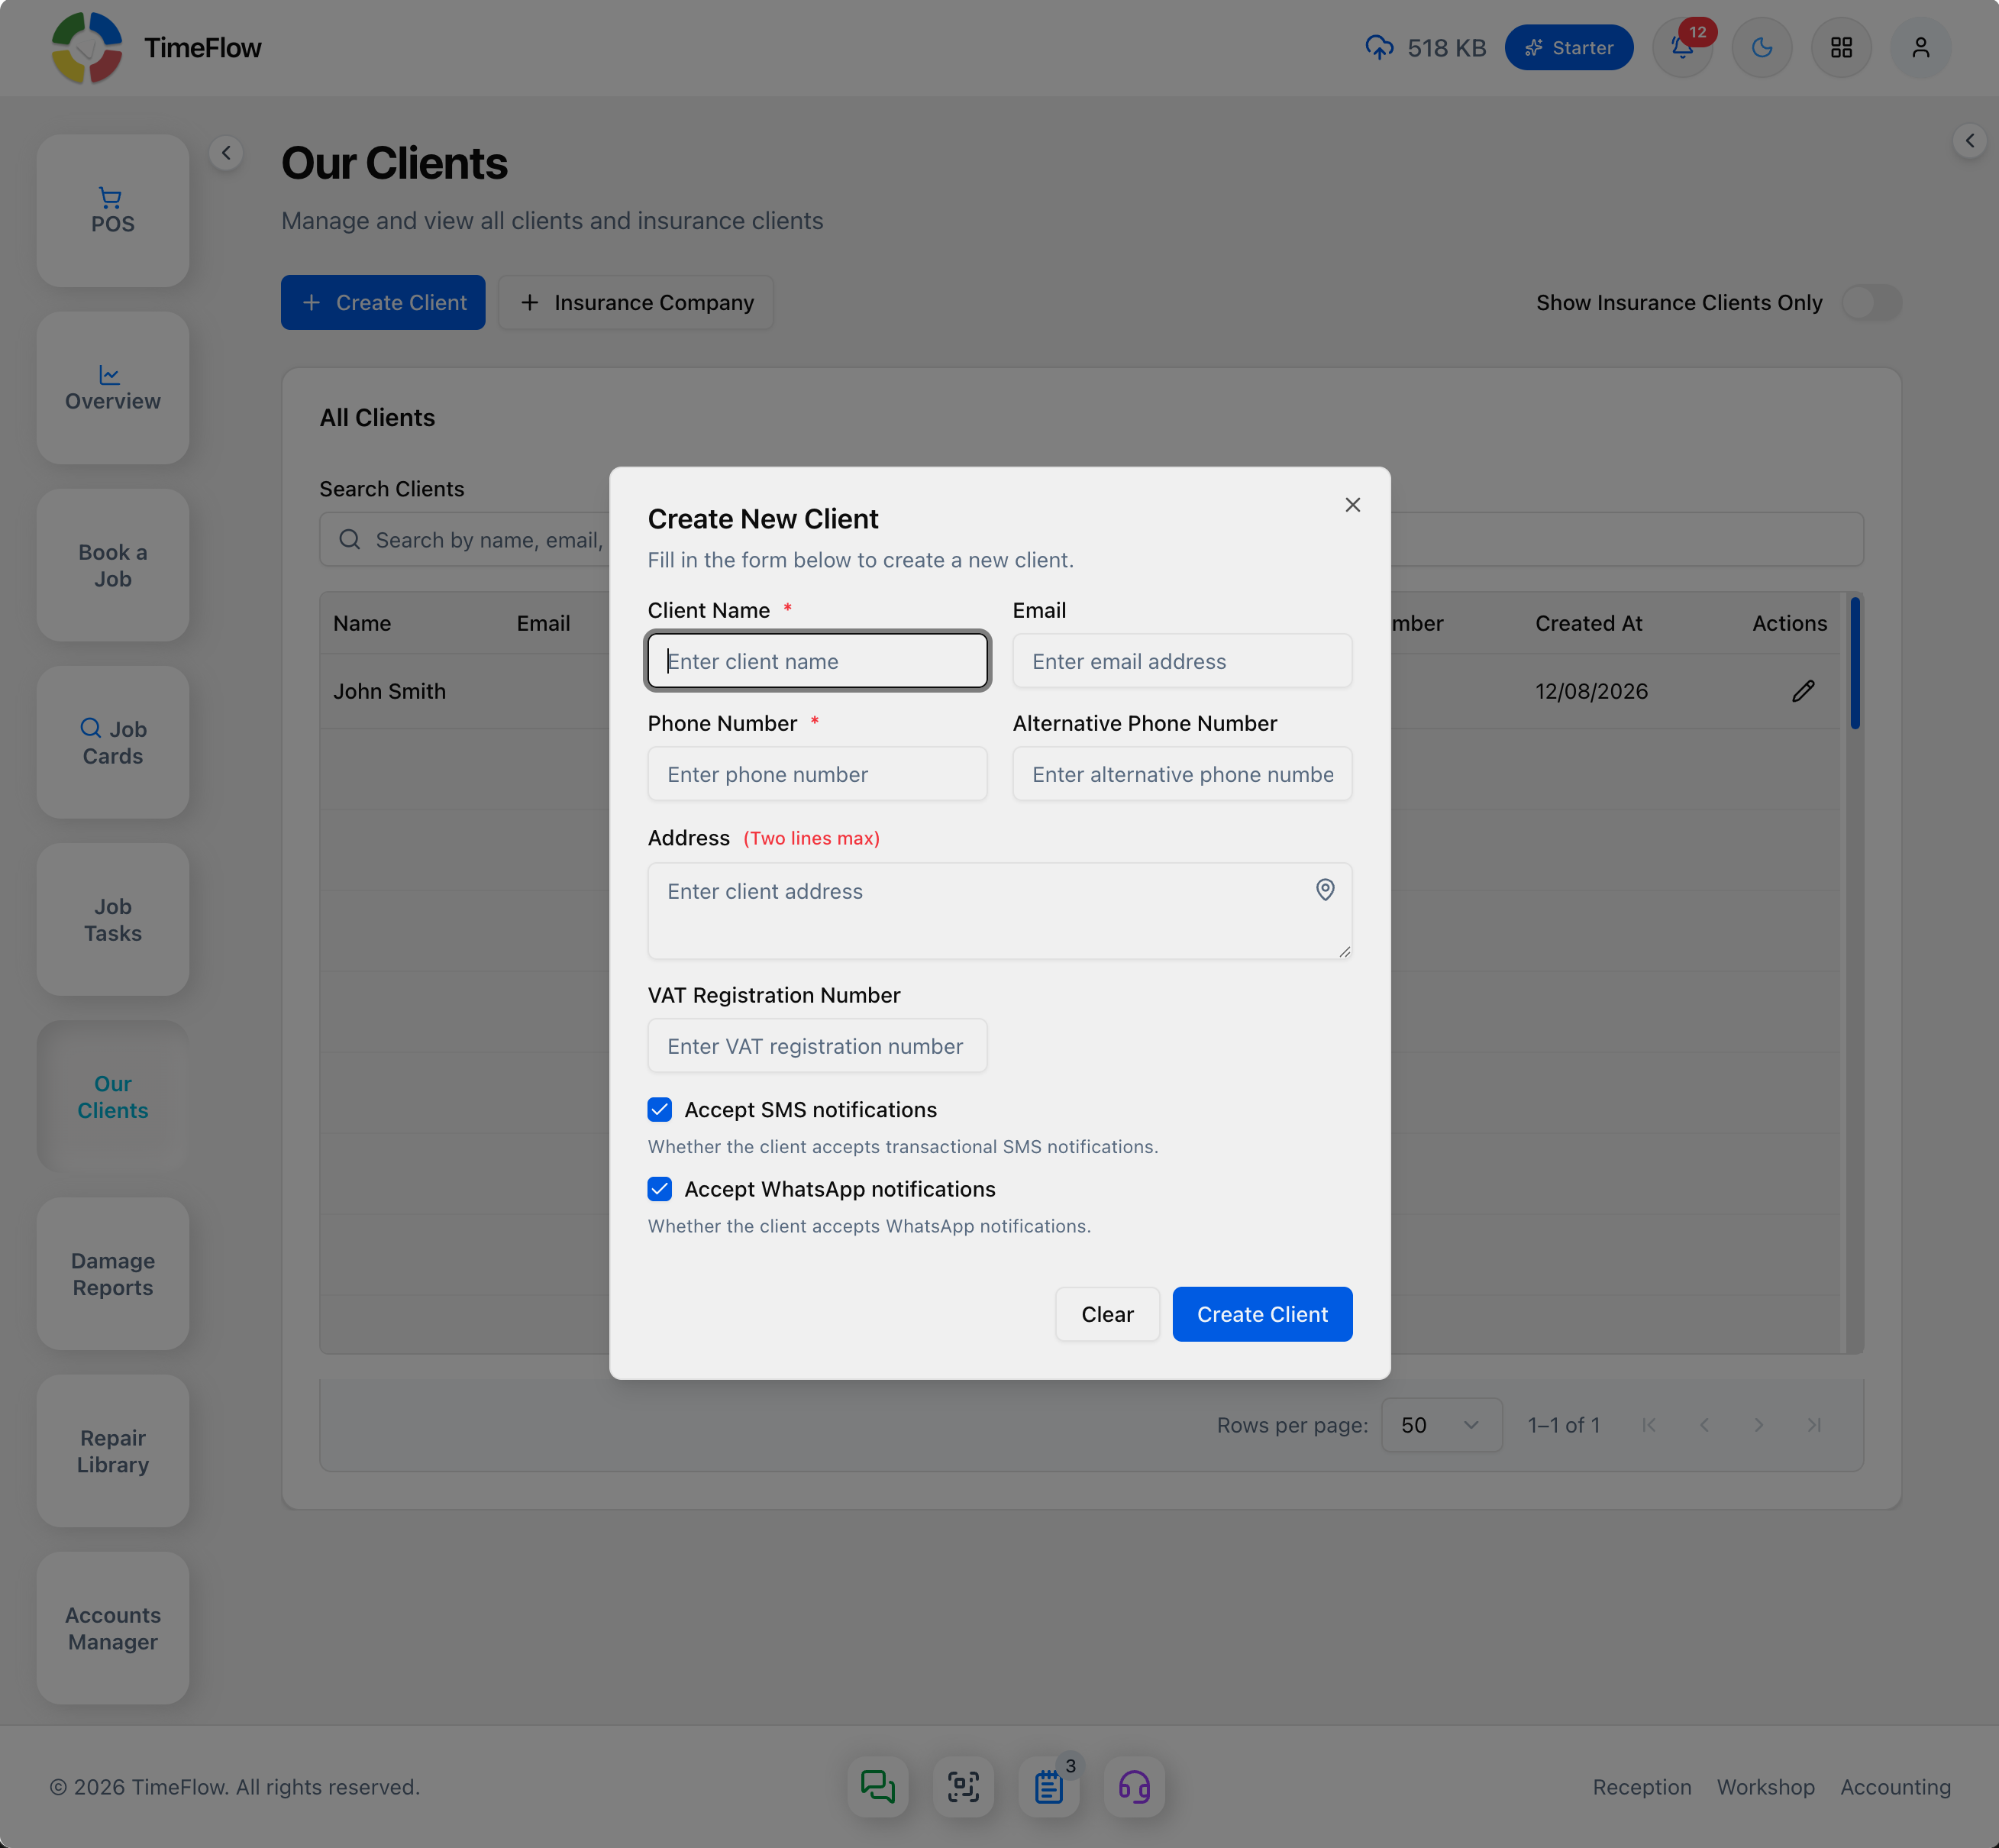
- Click Create Client (top left).
- Fill in the form:
- Client Name (required)
- Phone Number (required)
- Alternative Phone Number
- Address (two lines max)
- VAT Registration Number
- Accept SMS notifications and Accept WhatsApp notifications — both checked by default; uncheck either if the client opts out.
- Click Create Client to save (or Clear to reset the form). They'll now be selectable from the "Select existing" client search when booking a job card.
Adding an insurance company
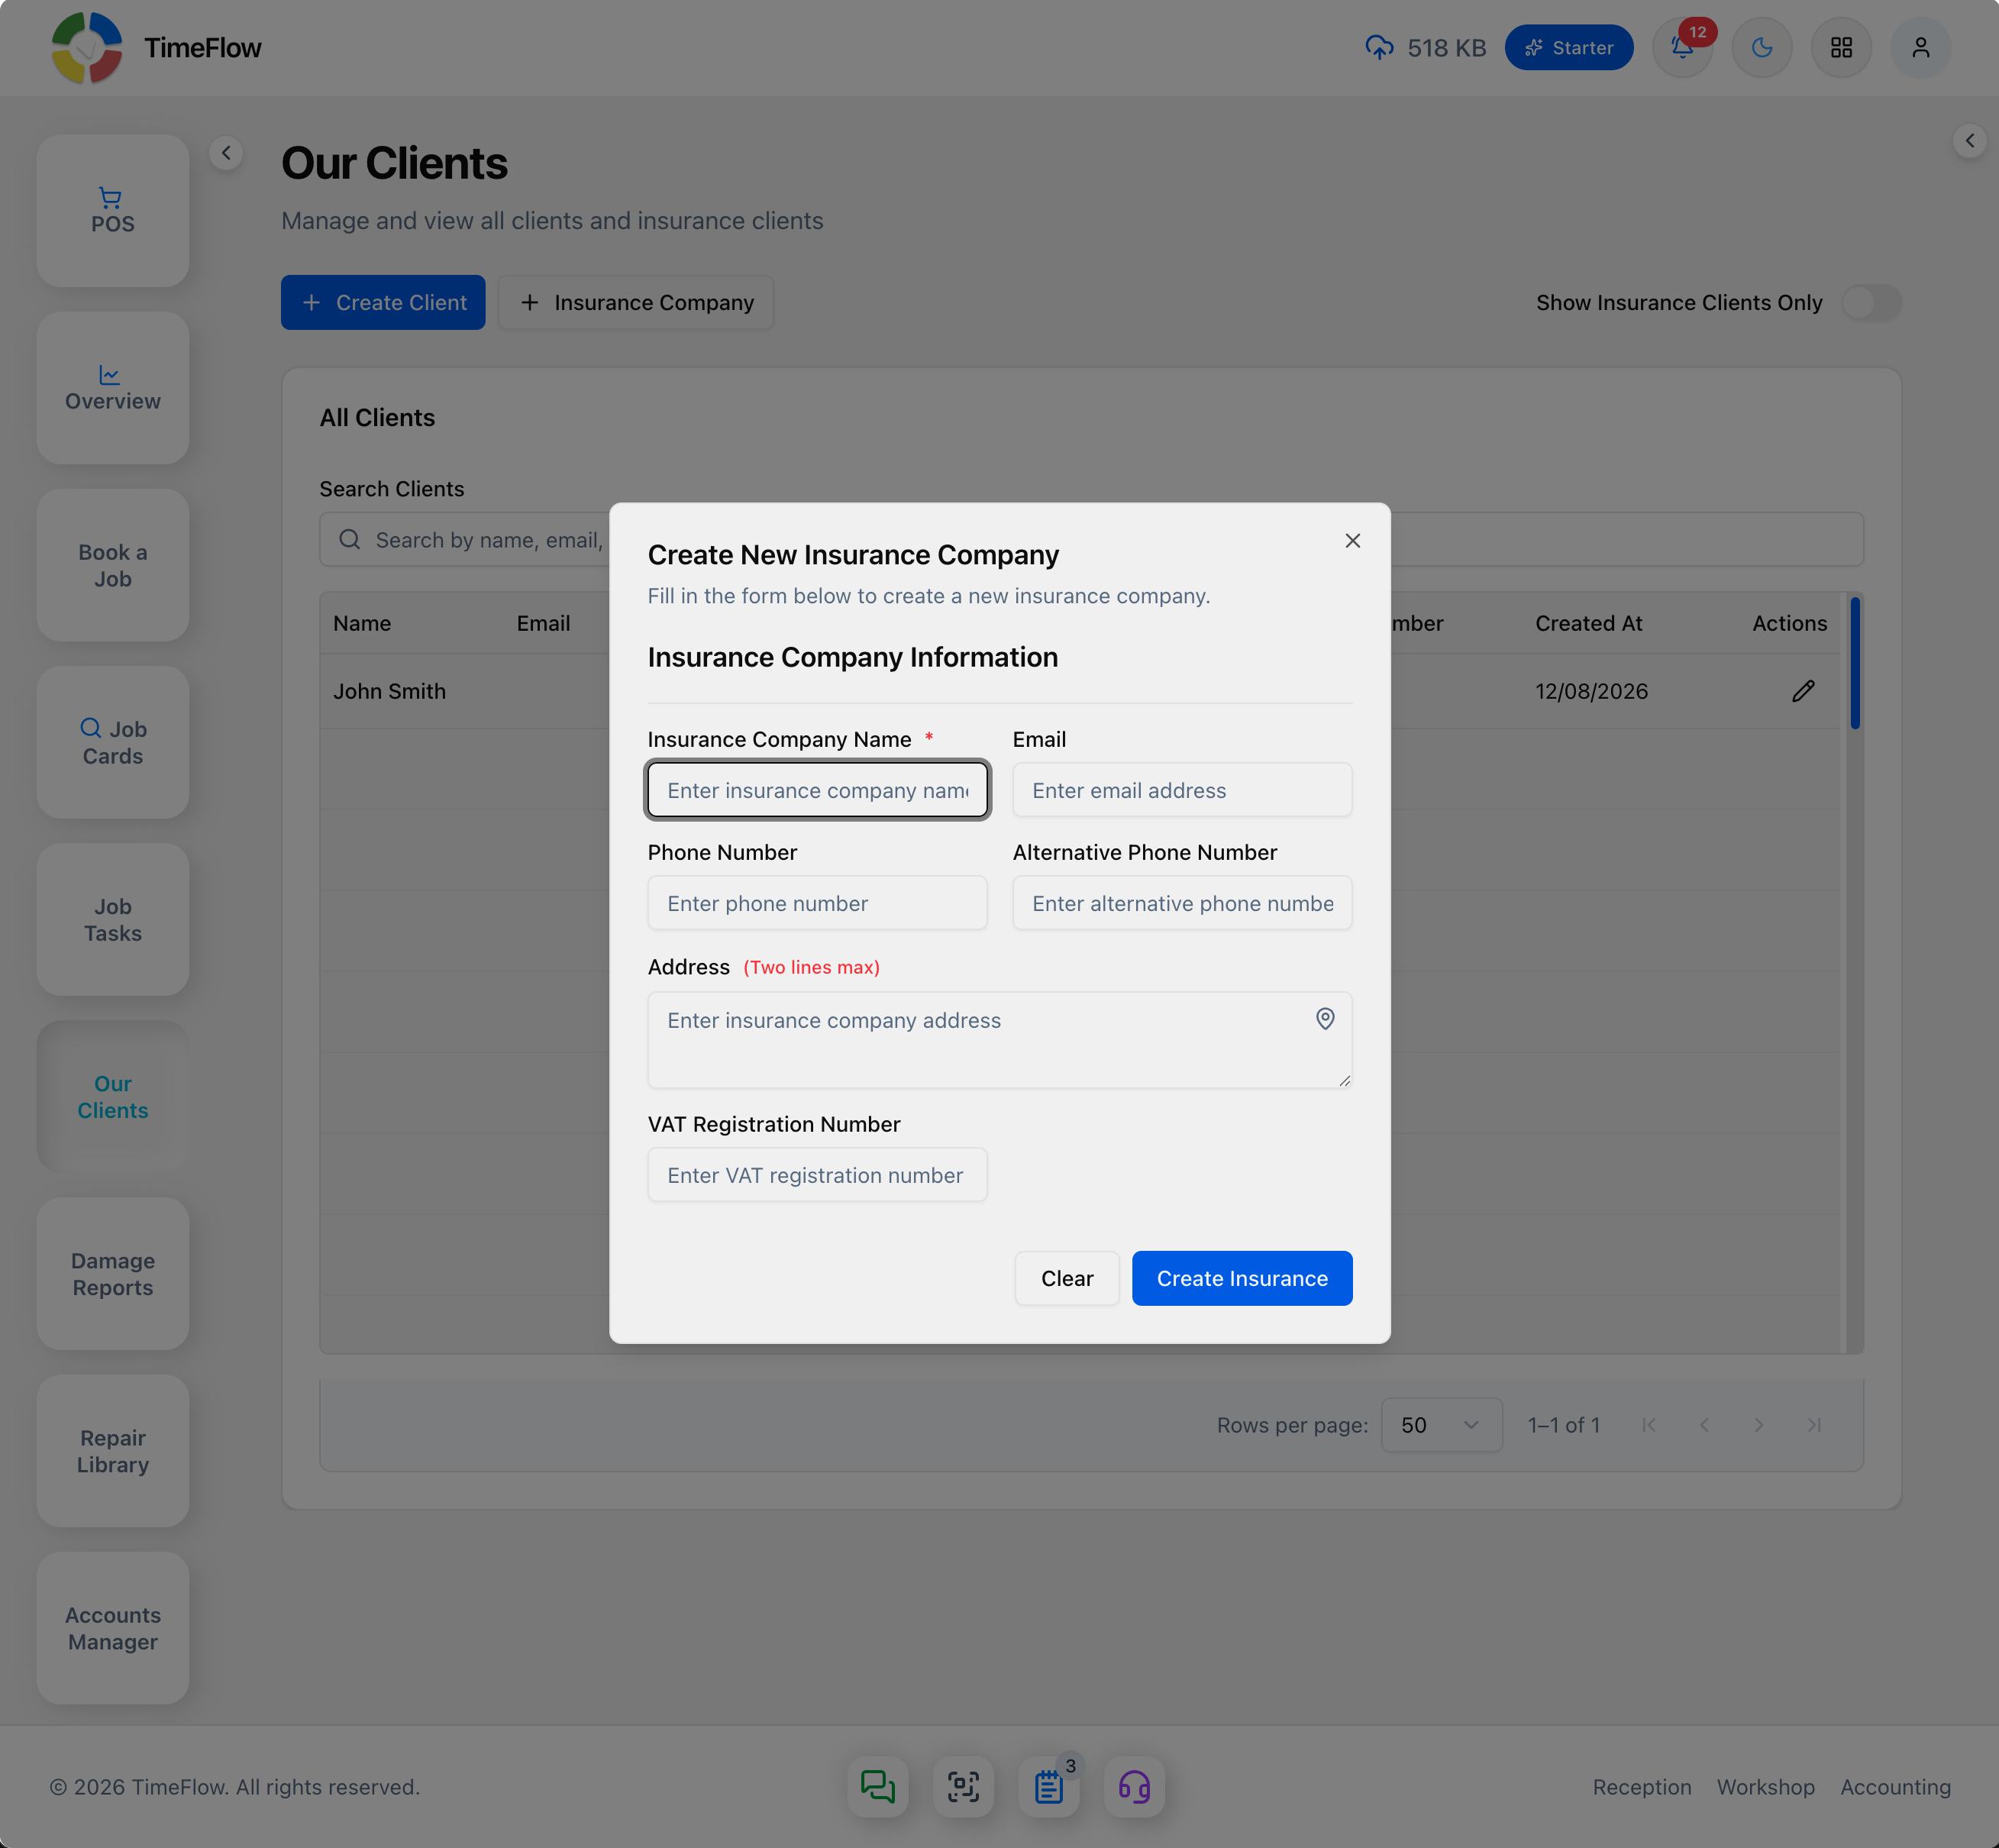
- Click Insurance Company (next to Create Client).
- Fill in:
- Insurance Company Name (required)
- Phone Number
- Alternative Phone Number
- Address (two lines max)
- VAT Registration Number
- Click Create Insurance to save (or Clear to reset the form) — it will now show up when selecting an existing insurance company on the job card booking form or Insurance Claims.
Editing a client or insurance company
Click a row in the table to open its edit dialog (Edit Client or Edit Insurance Company), update the fields, and save.
Related
- Client and insurance details you save here are what pre-fill when booking a job card (see the Booking a Job Card guide) and when tracking Insurance Claims.
Frequently asked questions
How do I add a new customer in TimeFlow?
Go to Our Clients, click Create Client, and enter at least the client name and phone number. They then appear in the Select existing search on the booking form.
Can clients opt out of SMS or WhatsApp messages?
Yes. Each client has Accept SMS notifications and Accept WhatsApp notifications checkboxes, both on by default — untick either if the client opts out.
Related guides
- Booking a job cardBook a device or vehicle in for repair: create a digital job card with client details, IMEI/serial, condition, fault, insurance claim, and intake photos.
- Customer accountsSet up the per-client financial account that invoices, quotes, deposits, and payments post against, including insurance-billed accounts.
- Insurance claimsTrack insurance repair claims in TimeFlow: create claims while booking, link multiple job cards to one claim, and see insurer, consultant, and device details.