
Purchase Orders in TimeFlow
Create purchase orders for suppliers, track them from draft through to receipt, and link Goods Receipt Notes to match what you ordered against what actually arrived.
Updated · Inventory & purchasing
On this page
Before you start
You need accounting permission. This is a Beta feature.
Finding this in the UI
- Left sidebar → Accounts Manager opens the accounting hub — choose Purchase Orders (Beta) → View Purchase Orders, or go directly to
/dashboard/accounting/purchase-orders.
Creating a purchase order
Click Add Purchase Order and fill in:
- Order Number* — auto-generated (e.g.
PO-10000). - Order Date*, optional Expected Delivery Date.
- Currency (shows your base currency) and Notes.
- Supplier — pick from Inventory suppliers (prefills Supplier Name/Address) or leave as "None (Manual Entry)" and type the supplier details directly.
- Line items — fill in an optional free-text Item Code field (not a search/link to an inventory item — just a text label), Description* (required), Quantity, UOM (a dropdown — EA (Each), KG, pack, etc.), Unit Price, Amount (calculated), Tax Category, Tax Rate (%), and a Tax Claimable toggle. Click + Add Item to commit the line — it drops into a running table below (Item Code/Description/Qty/UOM/Unit Price/Tax Category/Tax Rate/Net/Tax/Gross Amount, each with a delete icon) with Total Net/Tax/Gross Amount underneath, and the entry fields clear for the next line.
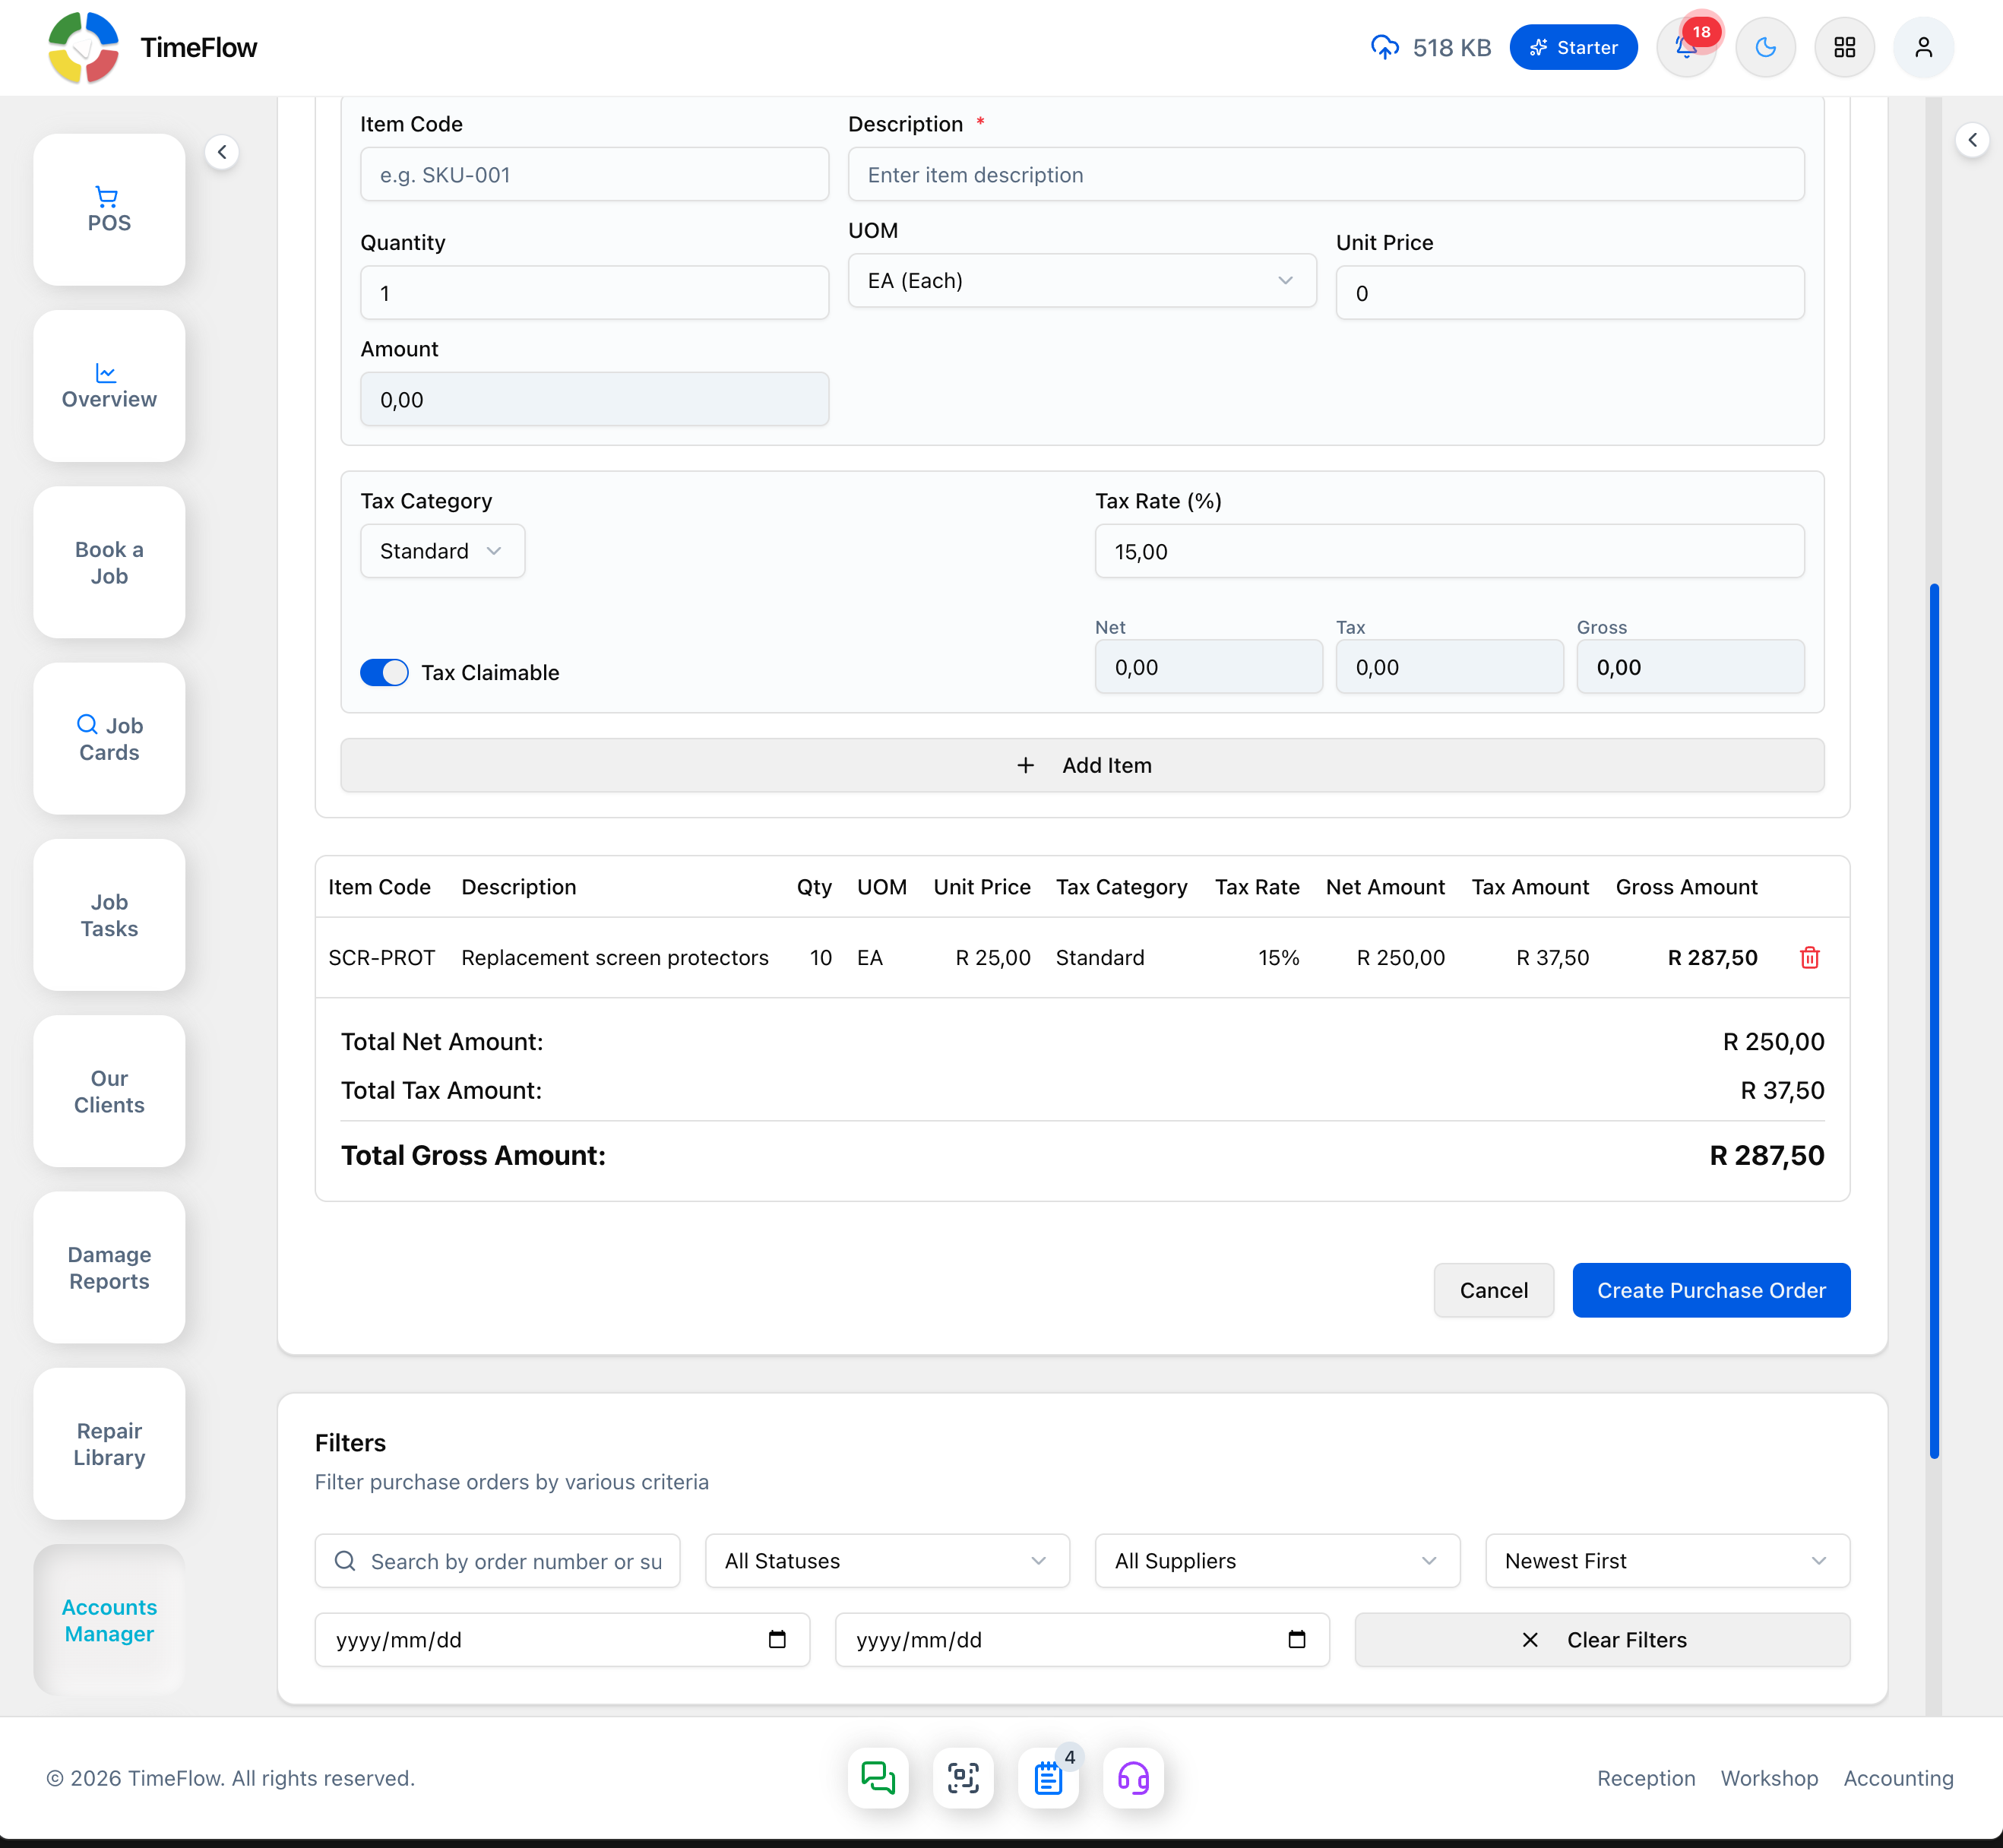
At least one line item must be added (via + Add Item) before saving — filling in the entry fields alone isn't enough. Click Create Purchase Order to save it in Draft status — editable and deletable while draft.
Moving it forward
- Send to Supplier (draft only) moves status from Draft to Sent, recording that you've issued it.
- Open a PO to see its status, totals, supplier details, and per-line quantity ordered vs. received with a progress bar.
- Receive stock against it via Add GRN on the PO detail page (or open Goods Receipt Notes with the PO pre-selected) — see the Goods Receipt Notes guide. The status moves from Draft → Sent → Partially Received → Received as GRNs are confirmed against it.
- Once a GRN has been confirmed against a PO, Edit and Delete disappear from the PO detail page — only Close Order and Cancel remain.
- Close Order once buying is finished and no more GRNs are needed — this is irreversible for receiving.
- Cancel Order voids it. Delete only works on drafts with no GRNs yet.
Finding and exporting
Use Filters on the list to search by order number/supplier, filter by status or supplier, set a date range, and sort. Use the download menu on a row for Download PDF or Print.
Tips
- Set up your suppliers under Inventory → Suppliers first — it makes the supplier field on a PO much faster to fill in.
- The PO detail page lists related Goods Receipt Notes for a full audit trail.
Frequently asked questions
How do I receive stock against a purchase order?
Open the PO and click Add GRN to create a goods receipt note. Confirming it updates the PO's received quantities and status.
Related guides
- Goods receipt notesRecord what actually arrived from a supplier against a purchase order, handle partial deliveries, and confirm receipt to lock the GRN.
- Purchase invoicesRecord supplier invoices with or without a purchase order, claim input VAT, approve, and track payment status from unpaid to paid.
- Inventory insightsSee what to reorder, what's out of stock, dead stock tying up cash, best sellers, slow movers, stock value by category, and suppliers to contact.